Friday, April 19, 2013

Chocolate Pudding


I remember the first time I made chocolate pudding. I was about 11 years old, and my great grandparents were at my house. My Gramma Shirley brought me over to the stove with my copy of The Boxcar Children Cookbook (anyone else remember those books? I loved 'em), and helped me make chocolate pudding. It is one of m most distinct cooking memories.

I don't remember that specific recipe, but I do have an equally-excellent key for chocolate pudding. It's nearly identical to the Vanilla Pudding recipe from earlier this week. If you're still hankering for pudding, don't forget to check out the Tapioca recipe. This chocolate pudding serves as a great base for chocolate cream pie.

********************
Chocolate Pudding
Makes four servings

2/3 cup sugar
1/4 cup cornstarch
1/4 teaspoon salt
1/3 cup unsweetened cocoa powder
2 1/2 cups milk
4 large egg yolks
2 tablespoons unsalted butter, cut into pieces
1 teaspoon vanilla extract

1. Place a fine mesh sieve over a medium bowl; set aside. In a medium saucepan, off heat, whisk together the sugar, cornstarch, cocoa, and salt. Very gradually (a few tablespoons at a time) whisk in milk, taking care to dissolve cornstarch. Whisk in egg yolks.

2. Whisking constantly, cook over medium heat until the first large bubble forms and the mixture begins to thicken. Reduce heat to low, continue to whisk for one minute. Remove from heat and immediately pour through the sieve and into a bowl. Stir in butter and vanilla.

3. Serve warm (with whipped cream, if desired!), or place plastic wrap directly on the pudding (to prevent a skin from forming). Chill at least three hours and up to three days. Before serving, whisk pudding until smooth.

Wednesday, April 17, 2013

Vanilla Pudding


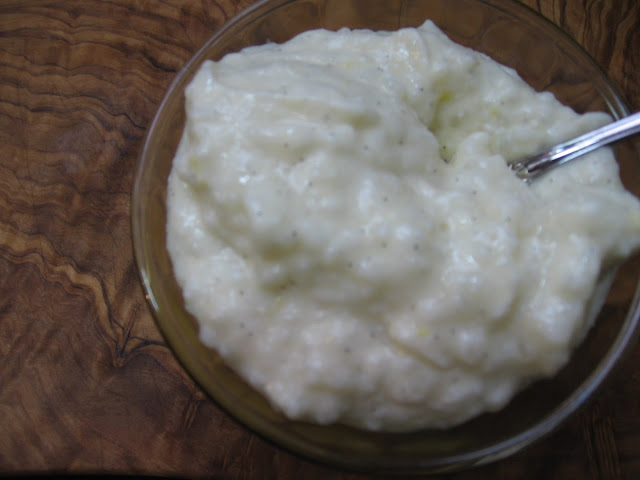
The pudding binge continues. (Tapioca has already been discussed.) Today, vanilla's on the docket. Eat this stuff straight-up, or use in other desserts, such as the filling of a Boston Cream Pie or donuts, or in a parfait or trifle.

********************
Vanilla Pudding
Makes four servings

2/3 cup sugar
1/4 cup cornstarch
1/4 teaspoon salt
2 1/2 cups milk
4 large egg yolks
2 tablespoons unsalted butter, cut into pieces
1 teaspoon vanilla extract

1. Place a fine mesh sieve over a medium bowl; set aside. In a medium saucepan, off heat, whisk together the sugar, cornstarch, and salt. Very gradually (a few tablespoons at a time) whisk in milk, taking care to dissolve cornstarch. Whisk in egg yolks.

2. Whisking constantly, cook over medium heat until the first large bubble forms and the mixture begins to thicken. Reduce heat to low, continue to whisk for one minute. Remove from heat and immediately pour through the sieve and into a bowl. Stir in butter and vanilla.

3. Serve warm (with whipped cream, if desired, or my favorite way - with mini marshmallows mixed in!), or place plastic wrap directly on the pudding (to prevent a skin from forming). Chill at least three hours and up to three days. Before serving, whisk pudding until smooth.

Monday, April 15, 2013

Tapioca Pudding


I've been on a pudding kick. For whatever reason, I've just been craving pudding. I must be getting old. Isn't pudding an old person thing? Or maybe I'm regressing. (Puddiiiiing POPS!).

The sad thing is at the particular intersection of food craving dilemma, it wasn't delightfully creamy chocolate pudding that I wanted, it was... tapioca. Oh tapioca (le sigh). It's so weirdly delicious. I'm slightly ashamed to say I really enjoy it; however, I'll risk public embarrassment in order to bring you this recipe, which I gently borrowed from Alton Brown with a few tweaks.

I'm sorry... I had to.
********************
Tapioca Pudding
Makes six servings

3 1/2 ounces large pearl tapioca (approximately 1/2 cup)
2 cups cold water
2 1/2 cups whole milk
1/2 cup heavy cream
1 egg yolk
1/3 cup sugar
1 vanilla bean
Pinch of kosher salt

1. Place tapioca in a medium mixing bowl along with the water. Cover and allow to stand overnight.

2. Drain water from the tapioca. Place the tapioca into a slow cooker along with the milk, heavy cream, vanilla bean (or 1/2 tablespoon vanilla extract) and salt. Cook on high for two hours, stirring occasionally.

3. In a small bowl, whisk together the egg yolk and sugar. Temper small amounts of the tapioca into the egg mixture until you have at least one cup. Add this mixture back into the remaining tapioca in the slow cooker. Cook for an additional 15 minutes, stirring at least once.

4. Transfer the pudding to a bowl and cover the surface with plastic wrap. Allow to cool at room temperature for one hour and then place in the refrigerator until thoroughly chilled.

Wednesday, April 10, 2013

Soft, Chewy Pretzels


I like having staple recipes that I can turn to over and over again to fit a variety of eating needs. Soft, chewy pretzels are one of those staples. Quick lunch option for kids? Check. Late night movie snack? Check. Friends coming over for board games? Check.

Make a batch of these pretzels ahead of time, they freeze well, like biscuits (just let them cool completely, then stick in a zip-top bag). Reheat in a brown paper bag at 350 degrees Fahrenheit for about 10 minutes and serve with tangy mustard or cheese sauce.


********************
Soft, Chewy Pretzels
Makes 8 large pretzels or 16 smaller pretzels

1 1/2 cups warm water
2 tablespoons light brown sugar
1 package active dry yeast (2 1/4 teaspoons)
3 ounces unsalted butter, melted
2 1/2 teaspoons sea salt
4 1/2 to 5 cups all purpose flour
Vegetable oil, to coat bowl
3 quarts water
2/3 cups baking soda
1 egg (mixed with 1 tablespoon of water to make an egg wash)
Course sea salt

1. Combine 1 1/2 cups water, sugar, yeast, and butter in a bowl and mix until combined (if using a stand mixer, use a dough hook). Let sit for five minutes.

2. Add the salt and flour to the mixture and mix until combined. Continue to mix/knead in the bowl until the dough pulls away from the sides of the bowl. If the dough appears to wet, add additional flour, one tablespoon at a time. Remove the dough from the bowl, place on a flat surface and knead into a ball with your hands.

3. Coat a large bowl with vegetable oil; add the dough and turn to coat. Cover with a clean towel or plastic wrap and place in a warm spot until the dough has doubled in size (about one hour).

4. Preheat the oven to 425 degrees Fahrenheit. Bring the 3 quarts of water to a boil in a large pot.

5. Remove the dough from the bowl and place on a flat surface. Divide the dough into eight equal pieces. Roll each piece into a long rope. To shape into pretzels, take the right side and cross over to the left. Cross right to left again and flip up.

6. Slowly add the baking soda to the boiling water. Boil the pretzels in the water solution, two at a time for 30 seconds, splashing the tops with the water with a spoon. Remove with a large, flat slotted spatula or a spider. Place pretzels on a baking sheet, leaving plenty of space between each pretzel, and brush the tops with the egg wash and season liberally with sea salt. Bake for 15 to 18 minutes or until pretzels are golden brown. Remove pretzels from baking sheet and allow to cool on a wire rack.

Monday, April 8, 2013

Homemade Twinkies


Eric turned three on April Fool's Day. My younger child is now three. Three! Where does the time go? (Oh, wait, I know... into sleepless nights, dirty diapers, potty training, cleaning up Legos and Hot Wheels and Chuggers, playing in sandboxes, endless bottles and sippy cups... but it's all worth it.) I asked him what he wanted to bring for a treat into his classroom birthday party. He chose Twinkies.

Twinkies? Really? Where the hell did that kid ever have a Twinkie? Haven't they been extinct most of his life?

Birthday Boy!

As luck would have it, I recently received a copy Classic Snacks Made From Scratch: 70 Homemade Versions of Your Favorite Brand-Name Treats, by Casey Barber, published by Ulysses Press. It's filled to the brim with delicious recipes for junk-food favorites, like Mallomars, Cheez-Its, Corn Nuts, Klondike Bars, and Jalapeno Poppers. Because the recipes are all made from scratch, I feel not quite as bad about eating the end-product.

So I made Twinkies. I was surprised how easy it was. A lot of steps and kind of "involved," but nothing hard, I would say. I didn't have a specific Twinkie-pan (Barber calls is a "canoe" pan), so I used my mini-loaf pans. A sheet pan or 13"x 9" would would find - just cut into rectangles. You can also use a muffin tin. The basics of the recipe follow, but go out and pick-up the book for full instructions and notes (believe me, this is one book you'll want to own).


********************
Twinkies (from Classic Snacks Made From Scratch)
Makes 16

5 large eggs, at room temperature
1 cup granulated sugar
1/2 teaspoon baking powder
1/4 teaspoon kosher salt
1 tablespoon vanilla extract
1 cup cake flour

1. Preheat the over to 350 degrees Fahrenheit. Spritz the pan(s) well with baking spray (I would suggest butter and flour, just to ensure a good release).

2. Separate the eggs whites and yolks into two large bowls.

3. Pour the sugar, baking powder, and salt into the bowl of a food processor and process for 15 to 20 seconds, until finely ground. Transfer to a medium bowl.

4. Using an electric hand mixer or a stand mixer fitted with the paddle attachment, beat the egg yolks on medium speed for about 20 to 30 seconds, until they start to froth, thicken, and lighten in color. Slowly add the ground sugar mixture and the vanilla, and continue to beat until the eggs are very thick and pale - almost off-white and creamy in color. Reduce the mixer speed to low and stir in the flour. Set aside.

5. Using an electric hand mixer on high speed or a stand mixer fitted with the whisk attachment on medium-high, whip the egg whites into soft peaks. Stir about a quarter of the whipped egg whites into the batter to loosen it up, then gently fold in the remaining whites in two or three batches, working slowly to incorporate them without destroying their fluffiness.

6. Pour the batter into the prepared pan; if using a canoe pan or muffin tin, fill each well two-thirds full. Save any remaining batter for a second batch.

7. Bake until the cakes are puffy and golden brown and a tester inserted into the center comes out clean. Timing may vary, so watch carefully, but will be 8 to 10 minutes for canoe shapes, 13 to 15 minutes for cupcakes or mini loaf pans, and 18 to 20 minutes for 8-inch square metal baking pans or hot dog pans.

8. Cool the cakes in the pan for 10 minutes on a wire rack; they will shrink and pull away from the pan sides. Then line the wire rack with waxed paper and spritz the paper lightly with baking spray. Invert the pan to turn the cakes out onto the rack. Cool completely before cutting into Twinkie shapes (if using a loaf or hot dog pan) and filling.


For the Filling:
3/4 cup granulated sugar
1 tablespoon light corn syrup
1/4 cup water
3 large eggs
1 teaspoon vanilla extract

1. Stir the sugar, corn syrup, and water together in a small, high-sided saucepan over medium low heat just until the sugar is fully dissolved and the liquid no longer feels granular. Clip a candy thermometer to the side of the pan and bring the liquid to a boil without stirring. Continue to heat until the sugar syrup reaches 235-240 degrees Fahrenheit (soft-ball stage).

2. Meanwhile, using the stand mixer fitting with the whisk attachment, whip the egg whites on medium speed just until soft peaks form. Just before the sugar syrup reaches soft-ball stage, restart the mixer on low speed. When the syrup is at temperature, carefully drizzle it into the egg whites.

3. Increase the mixer speed to medium-high and whip for five to seven minutes, until the filling is thick, shiny, and white, forming stiff peaks. Add the vanilla and stir for another 15 seconds to incorporate.

Assembly:
1. Fill a pastry or gallon-size zip-top bag with the filling.

2. Use a sharp paring knife to cut small holes in the cake bottoms (a single hole in the cake bottoms for cupcakes, three holes for other sizes). Insert the pastry tip into each hole and squeeze gently to fill. The cakes will swell slightly as the holes fill up.

3. Store the filled cakes in the refrigerator in an airtight container for up to a week; as with most sponge cakes, they really do taste better after resting overnight than if eaten fresh.