Showing posts with label Summer. Show all posts

Wednesday, July 17, 2013

Summer Playlist

There's just something about summer that's inexplicable. Maybe it's the reckless potential of all that it contains. The days are long, the nights are hot, and the restlessness that they bring makes us all feel young, even if for a bit.

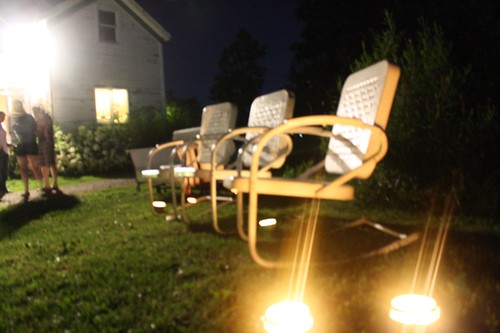
Barnside Movie at Silly Goose Farm
From Summer 2011 Barnside Movie Party

When I think of summer, I think of swimming with my high school boyfriend ('sup Brian) with a crank radio on the dock broadcasting the Yankees game; I think of throwing bocce in the backyard with a good drink in hand while laughing with friends as the sun goes down and the fireflies come out; I reminisce of hot, sweaty days pitching hay into the barn and the smell of tractor oil.

In all of those situations, certain songs that are intrinsically summer come to mind. There are those tunes that are mandatory listening as the temperature rises; they make you want to put an extra cuff in your cut-offs, slather on sunscreen, and dance in the most fun, seductive manner with your best friends and lovers. Songs by The Beach Boys, Sam Cooke, John Mellencamp, Snoop... Sure, they're good any time of year, but even better when the windows are down and the wind whips through your hair, pulling tiny little beads of sweat off your skin. They beg of lazy adventures, limited clothing, and getting lost in a moment seemingly suspended in time.

I've asked some of my favorite people to help me compile a quintessential summer playlist, complete with songs of nostalgia, novelty, obscurity, and apropos seasonal mentions. It seems for each person, there is a song that just can't be heard without flashbacks to a summer memory (for me, it's driving my first car, my Mustang, at unreasonably high speeds with Bowie on repeat, headbobbing harder than an over-zealous hooker). Read on (and listen) below - there's about 50 songs, so scroll through. Did we miss your favorite summer song? Got a memory to accompany? Share in the comments and I'll work to update the list!


Jenny Witte, impeccably stylish editor-in-chief and my gadabout soul sister: Although not technically ABOUT summer, "Waiting on a Friend," by The Rolling Stones always reminds me of summertime. Mick is hanging out on that front stoop in the video, just sort of wasting the day away the way summer days can sometimes go, where it starts getting dark and you realize you've just been hanging out all day. It's so relaxed and laid back, it makes you want to just sit around and wait too. And of course Mick is just at his most louche, tight pants best in this video. I love it.

Tom Makovitch, Artist Extraordinaire: I couldn't decide on just one song, so two it is. The first is "Origins" by Tennis. Whenever I listen to music I never hear the lyrics separately from the instruments. I hear them as one digesting the song as a whole piece. My second is "Naked Kids" by Grouplove and it overwhelms me with nostalgic happiness.

Kelly Kramer, Resident BFF and music festival champion: Long days filled with sunshine, road trips to the beach, outdoor brunches that last until nightfall, and baseball games - thinking about summer yet? For me, nothing can bring about these feelings of summer better than music. The music of summer should automatically make you dance, put you in a good mood, or at least make you think about all the things that make you cherish the summer. The scenario that epitomizes what summer means to me is sitting on a mountain at a music festival listening to my favorite jams. And what song will you ALWAYS hear at a festival? "The Weight," by The Band. Imagine day drinking with all your best friends when you heat the first few chords of "The Weight." You automatically know that for the next four and a half minutes, everyone will be engrossed in the song. Whether you know all the lyrics of have made up your own, it's a hell of a good time singing at the top of your lungs to the ultimate story song. There will be lots of smiles, cheers with beverages, and lighters in the air. You just can't be in a bad mood once those chords are played, and for me that's the best part of the summer - getting lost in the feeling that the season, these friendships, and the beer supply will never end.

Jillian Kalonick, everyone's favorite red-headed librarian: I used to date a guy who liked any song that had "ooh ooh oohs" in it. I know he would dig "White Wave" by Portastatic. I love the nostalgia for teenage rebellion, the stinging sunburn, and "Yelloe Brick Road" on the jukebox. It's the perfect thing to blast with the windows down on the way to the shore.

Braden Russom, cookbook author, brother-in-the-bonds, and business confidante:  I know it's a bit cheesy, but I guess I'd say "Boys of Summer," by Don Henley. It's kinda got everything. It's a summer love/lust story, and the repeated, driving drums and guitar have a relentlessness that's almost oppressive, like a long, hot, summer. I think my attachment to it comes from being about 12 and seeing it on VH1. The sepia-toned video and the not-so-subtle sexiness really grabbed me. I felt a bit like I was getting a glimpse into what the older, more popular kids were doing during their summers.

Julie White Eklund, my cocktail co-conspirator and touchstone of what's cool in the best esoteric ways: Despite my penchant for thoughtful, lyric-driving music, there is just something about humid weather that calls out for crunk. I find that "Get Low," by Lil Jon is perfect for cooking and dancing around in the kitchen on one of those muggy thunderstorm nights when the sweat is dripping down your neck in little rivulets that are either gross or the sexiest thing ever. It's just a matter of where your head is at. (editor's note: Julie has here own list right here.)

Shannon McGill, tempting songstress with hair one could lost in for days: "Green Garden," by Laura Mvula is infectious, ebullient, beautiful, and lust like its title. Mvula's voice is warm and inviting and the backing vocals... woah! The thing is just perfection, it just envelops you in beauty. Swallows you right up and makes you a devotee instantly! Like the refrain says, "I'll go wherever you go, wherever you take me, I'll go." I'd follow this woman anywhere! This song just knocks me out and oozes summer. It's what summer sounds like. "Birmingham" is a winding, stomping, snaking story of two musicians in love. After I first heard it, I listened to it for 4 days straight, just this one song. It's all my ears wanted. Here is the wanderlust and restlessness that's inherent in summer. Forever this song will represent summer of 2013 for me. 

Taya Matthews, operatic crooner and master of brevity: "Breathe," by Telepopmusik. Gosh is this ever the song...

Share your songs below!

Thursday, September 13, 2012

Corn Cob Jelly

Please excuse the wild children and Cozy Coupe in the background.

File this under "Weird Things To Can" (perhaps along with Tomato Jam). Corn cob jelly sounds so, well, weird, right? How could that possibly taste good?

It does, I promise. In fact, it tastes remarkably like wildflower honey. I've heard others make that claim, but I didn't believe it until I tried it for myself. But kind of like Queen Anne's Lace Jelly, this isn't something I would necessarily want to add to my PB&J's. So after I made it I had to figure out how to use it. Turns out it tastes great on a cheese board, on fried green tomatoes, on hush puppies, and even on top of more corn (in the form of fritters). I'm sure it would be delicious on any other kind of pan-fried offering. I might even get brave and try it in place of honey in different sauce and dressing recipes. If you try to make it, let me know and tell me how you used it!

Oh, and my pal Jillian has a great how-to for freezing corn, in case you were interested (save those cobs, Jillian!).

********************
Corn Cob Jelly
Makes 3 1/2 cups, or 3 1/2 half-pints

12 sweet corn cobs
4 1/2 cups water
3 1/2 cups sugar
1 packet liquid pectin

1. In a large pot, combine water and corn cobs. Cut the corn cobs in half (carefully!) if necessary. Cover and boil for 30 minutes. Allow to cool slightly.

2. Using cheesecloth and/or a fine mesh strainer, pour out the liquid and reserve it. Discard corn cobs (carve yourself a pipe, leave for squirrels and other critters, or simply compost). Rinse out the pot and add the "corn stock" back to it.

3. Place the pot over medium-high heat and add sugar. Bring to a boil and add pectin. Reduce heat to medium and continue to cook until the jelly is at preferred "set" stage (when it sheets off your wooden stirring spoon or congeals as soon as it hits a plate pulled from the freezer).

4. Carefully pour the hot jelly into desired vessel(s) (freezer jars, canning jars, or a dish for the refrigerator). Wipe rim(s) and cover. If you want shelf-stable jelly, process in a hot water-bath canner for time appropriate to your jars (5 minutes for quarter-pints, 7-10 minutes for half-pints, 15-20 minutes for pints). Jelly will last for 3-6 months in the fridge and up to a year in the freezer or pantry (if processed properly). Enjoy!

*Optional step: If you want your jelly to be more yellow, add a few drops of yellow food color to the corn stock before adding sugar and pectin.

Tuesday, September 4, 2012

Bread and Butter Pickles


Bread and butter pickles are kind of like sunshine in a jar. So sweet and so tangy at the same time. If you've never made them before, be warned: It takes a while. But it's mostly hands-off time. Unlike basic dill pickles, bread and butter pickles require several steps but are still pretty easy to make.

********************
Bread and Butter Pickles
Makes about 4 pints

2 1/2 pounds pickling cucumbers
1 pound white onions, thinly sliced (about one large onion)
1/4 cup pickling salt
1 1/4 cups white distilled vinegar
1 cup apple cider vinegar
2 1/4 cups sugar
1 tablespoon mustard seeds
1 teaspoon crushed red pepper flakes
3/4 teaspoon celery seeds
1 inch cinnamon stick
6 allspice berries (plus a pinch of ground allspice)
6 whole cloves (plus a pinch of ground cloves)
1/2 teaspoon turmeric
Ice
Grape leaves (optional)

1. Clean the cucumbers thoroughly and remove all dirt, debris and leaves. Remove the ends (cut off a 1/8-inch slice from each end), then slice the cucumbers into 1/4-inch thick rounds. Place in a large bowl along with onions and salt. Mix together, then cover with ice and allow to sit at room temperature for two hours (don't skip this step! It keeps the cukes crunchy after pickling).

2. Rinse cucumbers and onions in a colander thoroughly to remove salt. Drain.

3. In a large pot, combine the white and apple cider vinegar, sugar, and spices. Whisk to dissolve sugar and bring to a boil. Add cucumbers and onions and stir to cover with vinegar mixture (brine). Bring back to a boil.

4. Using a slotted spoon, place the cucumbers and onions in sterilized pint-size canning jars (if using the grape leaves, which are a natural source of alum and help keep pickles crunchy, add one leaf-per-pint to the bottom of jars before adding cukes). Fill to 1/2-inch from the top of the jar. Pour brine over the top of cukes and onions, leaving the same 1/2-inch headspace.

5. Wipe the rims of the jars clean and add sterilized lids/bands. Process in a hot water-bath canner for 15 minutes (20 minutes for elevations above 6,000 feet). Or, store in the refrigerator until ready to eat. Enjoy!


Sunday, July 22, 2012

Jalapeno Simple Syrup Margarita


Just like with Rosemary Simple Syrup, Jalapeno Simple Syrup can be used in so many ways. My favorite, though, is in a margarita. It's just so, so, so, so... good. I mean, really good. I just love the way the sweet and spicy qualities of the syrup blend with the citrus in the margarita. Kind of like eating an orange and sucking on a Red Hot at the same time (ooh, wait, maybe that doesn't sound so good).

Get out the castanets, baby, it's about to get ca-razy.

********************
Jalapeno Simple Syrup
Makes One Cup
1 cup water
1 cup sugar
2 jalapeno peppers, sliced thin

In a small saucepan, combine all ingredients and cook, stirring constantly, over medium-high heat until all sugar has dissolved. Reduce heat to medium and allow to simmer to three to four minutes, stirring frequently. Remove from heat and allow to cool for five minutes. The syrup will be slightly greenish-blue. Strain out the pepper slices and store in an airtight container. Jalapeno simple syrup will last in the refrigerator for up to three months (if you add a splash of vodka, it will last upwards of six months).

********************

Spicy Margaritas
Makes One Cocktail

Kosher salt or white sugar
Lime zest
Ice cubes
2 ounces blanco tequila*
1 1/2 ounces freshly squeezed lime juice
1/2 ounce orange liqueur (like Cointreau or Grand Marnier)
1/2 ounce jalapeno simple syrup

1. On a small plate, combine a pinch of lime zest with either the sugar or salt (or both - your preference). Rub a wedge of lime around the rim of an old-fashioned glass, then dip the rim of the glass at a 45-degree angle into the sugar/salt/lime zest mixture (for and extra spicy kick, you could also rub a little jalapeno pepper on the rim of the glass... if you're one of those people who like the hurts so good kind of pain)

2. Fill a Boston shaker with ice, then add the tequila, lime juice, orange liqueur, and jalapeno simple syrup. Shake until the shaker is frosty on the outside (about 30 seconds)

3. Place three ice cubes in the old-fashioned glass, then strain the margarita into the glass. Garnish with a lime sprig. Enjoy!!

* A good margarita is all in the details. Go for a quality 100% pure blue agave blanco or silver tequila. Patron Silver is good on the higher-end of price. 1800 brand tequila is also a winner at a lower price point.

**To make a pitcher of cocktails, increase the ingredients to 2 cups of tequila, 1 1/4 cup lime juice, 1/2 cup of orange liqueur, and 1/2 cup of jalapeno simple syrup. Stir together with ice in a large pitcher and pour into 8 glasses. 

Wednesday, July 18, 2012

Hot Fudge Sauce


Did you go make those brownies I told you about? Good... now go make this delicious hot fudge, grab some ice cream (and a spoon!) and make yourself a Sundae. It's hot outside and you deserve it.

********************
Hot Fudge Sauce
Makes About 2 1/2 Cups


1/2 cup heavy cream
1/2 cup unsalted butter, cut into pieces
1/2 cup light corn syrup*
1/2 cup confectioners' sugar
9 ounces bittersweet chocolate, chopped
1 teaspoon vanilla extract

1. In a heavy saucepan, combine the cream, butter, corn syrup and sugar over medium-low heat. Stir constantly and cook until the butter melts and sugar dissolves (about three minutes).

2. Add the chocolate and sire until melted and smooth (about two minutes).

3. Remove the sauce from the heat and stir in vanilla. Allow to cool slightly before using. Store in an airtight container in the refrigerator for up to a week. To re-heat, spoon the desired amount into a microwave-safe container and microwave for 20 seconds, then stir. If needed, continue to re-heat in 20-second 10-second intervals.

*Replace corn syrup with brown rice syrup if desired. 

Monday, July 16, 2012

Watermelon Julep


I just contributed a new cocktail recipe for From Scratch Club, if you'd like to check it out. It's called a Watermelon Julep, and it's exactly as it sounds and more delicious than imagined! I hope you'll check it out and make one soon.

You can read my other From Scratch Club posts here, or follow my From The Blogs Pinterest board to stay abreast of the latest posts!

Monday, August 22, 2011

Peach Pie


My dad's birthday was last week, and given the choice between peach pie and his favorite cake (a chocolate mayonnaise cake - don't knock it until you try it), he'll usually choose peach pie. How appropriate, then, that peaches in the Northeast hit their peak right around his birthday! While I'm still dabbling in perfecting my peach pie recipe, here's the recipe I'm currently using (if you have a great recipe or some tips, please share them in the comments! I'd love to hear). It's a great way to wrap up this week's Peach-Palooza.


********************
Peach Pie
Makes one 9" pie

Crust:
2 1/4 cups all-purpose flour
3/4 teaspoon salt
2/3 cup shortening
8-10 tablespoons ice water

1. Combine flour and salt. Add shortening and cut it into the flour mixture until it resembles coarse cornmeal or small peas.

2. Add the water, one tablespoon at a time, until the dough is able to form and hold a ball.

3. Divide the dough in half, and wrap each half in plastic wrap and refrigerate for at least an hour. Roll onto a well-floured surface. Makes enough for a double-crust pie.

Filling:
1/2 cup sugar
2 tablespoons quick-cooking tapioca
1/4 teaspoon ground cinnamon
1/4 teaspoon ground nutmeg
6 cups thinly-sliced, peeled peaches (fresh or frozen - do not thaw frozen peaches)
1 egg, separated
1 tablespoon milk or cream

1. Preheat over to 425 degrees Fahrenheit. In a large bowl, mix together sugar, tapioca, cinnamon and nutmeg. Add peaches and stir to cover the peaches with the sugar mixture. Let stand for 20 minutes.

2. On a well-floured surface, roll out one-half of the pie crust dough to form an 11" circle. Transfer the dough to a 9" pie plate (either by gently rolling it back on to a rolling pin or by folding into quarters). Mold the dough to fit the pie plate and leave an overhang of dough. Prick a few holes in the bottom of the crust with a fork. Brush the bottom of the crust with the egg white. Roll out the second half of the dough (in the same manner as the first) and have it ready to cover the filling.

3. Once the filling is ready, add it all at once to the prepared pie plate. Cover the filling with the second half of the pie dough. Crimp the edges of the top and bottom crusts together. Cut three or four small slits in the  top crust to allow steam to escape.

4. Mix together the egg yolk and milk. Brush over the top of the pie, and sprinkle with sugar (optional). Cover the edges of the pie crust with strips of aluminum foil. Place pie on a baking sheet.

5. Place pie in the oven for 30 minutes. Remove foil from pie and reduce oven temperature to 375 degrees Fahrenheit. Bake for an additional 30 minutes or until pie filling bubbles and the crust is golden. Cool on a wire rack.

This recipe is adapted from the Better Homes and Gardens New Cookbook (an essential for every kitchen).

********************

PS- I'm thinking of doing a entire series of pie tutorials. Is that something you would be interested in reading? Let me know in the comments, and in the meantime, here are a few pictures of my Dad :-)

Camping this year at Belvedere Lake

Last fall

My favorite picture of my dad and I

Blowing out his birthday pie candle with help from Edie

Thursday, August 18, 2011

SWILLED: Peach Cocktails


Today's peach-fix comes in the form of a summery libation (or two). Peaches are surprisingly versatile when it comes to cocktails and work well with several types of alcohol and mixers. I'm over at From Scratch Club today talking about two peach cocktails (and a mocktail substitute), the Positano Peach and the Sweet Savannah Sipper. Make them tonight to help kick-off your Thirsty Thursday and prepare for the weekend!

PS - Eric really liked the non-alcoholic version of the Sweet Savannah Sipper, and here's proof (he just learned "Cheers!" too, so he likes to clink glasses with Dave :-)


Wednesday, August 17, 2011

Peach Fruit Leather


Peach Week goes nostalgic today, with a take on old-school Fruit Roll-Ups. In efforts to "adultify" this a bit, let's call it Fruit Leather, instead. Most recipes you find will tell you that fruit leather requires a dehydrator, but I'm going to debunk that myth. You can most definitely make fruit leather in your standard old oven. Any fruit can be used to make fruit leather, but "firmer" fruits (like apples and pears) might require a bit of water to "loosen" the puree up.


********************

Peach Fruit Leather
Makes Eight Large Strips

4 cups peaches (skinned, pitted and diced)
1/3 cup sugar
1 teaspoon ground cinnamon
1/2 teaspoon ground ginger
1/2 teaspoon ground cloves

1. In a blender, puree all ingredients together until smooth (if the puree is a bit thick, add some water to thin it out).

2. Line a jelly roll pan with waxed paper or a Silpat and spray with nonstick cooking spray. Preheat oven to 175 degree Fahernheit (if it doesn't go that low, heat to the lowest setting).

3. Spread the puree onto the prepared pan and spread out into a thin layer. Bake in the oven for 6-8 hours (or longer if necessary - a humid day might cause this to take longer). The fruit leather is "done" when it easily pulls off of the waxed paper or Silpat and stays together (with the pliability of actual leather).

4. Fruit leather can be wrapped in waxed paper and stored in the refrigerator for up to two months. This makes a great treat for lunches (especially with Back-to-School coming up!) and doesn't have any of the nasty chemicals or preservatives of conventional Fruit Roll-Ups. Enjoy!

Wednesday, August 3, 2011

Dessert Pizza


Everyone loves pizza, right? RIGHT?! I certainly do. I also love sweets. So, put "pizza" and "sweet" together and you get the perfect meal: Dessert Pizza. I posted the how-to on this delicious dish over at From Scratch Club. Check it out if you get the chance. Nectarines and black raspberries not your thing? Here are some other Dessert Pizza suggestions:

- Raspberry jam, mixed berries, drizzle of chocolate

- White chocolate, strawberries, chopped pecans

- Lemon curd, candied citrus peel, mint leaves

Enjoy, and for more of my From Scratch Club posts, click here.

Wednesday, July 27, 2011

Chocolate Chip and Toasted Coconut Ice Cream Sandwiches


Ice cream sandwiches have sort of become the signature highlight of our Barnside Movie parties. I feel like the pressure is on to create tried-and-true pairings alongside interesting flavor combinations. This year, I decided to marry two of my favorite flavors together (chocolate and coconut), which led me to create Chocolate Chip and Toasted Coconut Ice Cream Sandwiches. Essentially, this is just a chocolate chip cookie recipe teamed with coconut ice cream. Sounds kind of boring, but when you taste it, fuggitaboutit, it's amazing. I hope you'll try it!

Chocolate Chip Cookies
Makes approximately 30 cookies

2 1/2 cups flour
1 teaspoon baking soda
1 teaspoon salt
1/2 cup butter, softened
3/4 cup brown sugar
3/4 cup white sugar
1 teaspoon vanilla
2 eggs
8 oz chocolate chips

1. Preheat oven to 375 degrees Fahrenheit. Combine flour, baking soda and salt, set aside. Combine butter, sugars, and vanilla in a large bowl, beat until creamy. Beat in eggs.

2. Gradually add the flour mixture and blend well. Stir in chocolate chips.

3. Drop cookies in rounded spoonfuls onto ungreased cookie sheets. Bake for 8-10 minutes. Allow to cool.


Toasted Coconut Ice Cream
Makes approximately 2 quarts

4 large egg yolks
1/2 cup sugar
1 tablespoon vanilla extract
2 cups heavy cream
1 cup whole milk
8 ounces unsweetened coconut milk
4 ounces sweetened shredded coconut (or more/less depending on your preference)

1. Preheat the oven to 400 degrees Fahrenheit. Place the shredded coconut in a single layer on a baking sheet. Place in oven until golden brown (about 10-15 minutes). Be sure to stir and re-arrange coconut frequently to prevent burning. Allow to cool completely. Note: The shredded coconut lends a chewy texture to the ice cream. Add more or less, depending on your preference (I like more!).

2. In a large bowl, whisk together egg yolks and sugar. Set aside. In a larger bowl (or in the sink) prepare an ice bath.

3. Combine heavy cream, milk, and coconut milk in a large pot and cook over medium-high heat. Bring to just shy of boiling. Slowly stream the milk mixture into the egg mixture, whisk feverishly.

4. Once approximately half of the milk mixture is added to eggs, add entire egg mixture back into the large pot. Cook until thickened, continuously whisking and scraping the pot (a good trick to knowing it is thick enough is when the mixture coats the back of a wooden spoon, run your finger along the spoon. If the track stays, it is thick enough). This will take only 2-3 minutes.

5. Voila! You have an ice cream base. Add the base to the large bowl and stick the bowl in the ice bath. Add the vanilla. Stir the base for several minutes to cool and release steam. Place a piece of plastic wrap over the base so that is touches it. This will prevent a skin from forming. Place the bowl in the refrigerator for several hours or overnight.

6. When the ice cream base is completely cold, and it to your ice cream maker and follow manufacturer instructions. Once the ice cream is nearly done churning, add in the toasted coconut. Transfer to a freezer dish. The ice cream will need to cure and harden for several hours or overnight.

Assembling The Sandwiches
Makes approximately 15 sandwiches

1. Pair like-sized cookies together. For each '"set," place a rounded scoop of ice cream on one cookie and smoosh the second cookie on top. Press until the ice cream nearly reaches the cookies' edges. If desired, press until ice cream it reaches the edges, then smooth the ice cream flush with the cookies with an off-set spatula.

2. Wrap cookies in freezer paper or plastic wrap. Allow to firm up for at least an hour.

Enjoy!

Tuesday, July 26, 2011

Summer Essentials


Summer seems to be flying by (August is nearly here!). I've still managed to scoop up some items I consider my summer essentials. Hopefully you can grab some of these, as well!

1. Tucker Panel Mini Dress, $385 Dave loves when I wear Tucker dresses (probably because many are so short! :-)

2. L.L. Bean French Sailor's Shirt. $29.50 This shirt embodies the "it" trend of the moment (nautical stripes) while maintaining a classic silhouette. Perfect for chilly mornings and evening on the water

3. Land's End Classic Open Toe Ballet Flat, $15.19 Dress 'em up or down, a great go-to shoe

4. Sperry Top-Sider Angelfish Boat Shoe, $75 Another classic. So comfortable I could wear them all day, every day

5. Levi's Signature Cut-Offs, $4 I bought a pair of these jeans at Salvation Army, cut them off and cuffed them

6. Smith's Rosebud Salve, $5 The perfect sheer pink for lips (smells good, too)

7. Physicians Formula Organics Mascara, $7 Blacky-black, and without all the nasty chemicals (paired with the rosebud salve, that's my entire make-up routine for summer)

8. Land's End Starfish Roll Sleeve Open Crewneck Top, $10.39 Perfect for bumming around the house, working in the garden, or a quick run to the farmers market

9. Alba Botanica Pure Lavendar SunBlock, $13.59 Keeps me looking pasty and smells good, too!

10. Moroccan Oil Treatment, $33 An investment in hair-care terms, but it works wonders, keeps frizz down on even the most humid days, and a little goes a long way (I have super-thick, relatively long hair, and this lasts me 5 months)

11. Arbonne Baby Care Body Oil, $9 I first came across this product when I had Edith, and I fell in love with it for the summer months when regular lotion is just to thick and sticky

12. Dogeared "Captain Of Your Ship" Necklace, $72 This was a lovely present from Dave and has an even lovelier message behind it

13. Ray-Ban Rounded Wayfarers, $179 I love that these glasses have the timeless Wayfarer shape, but are jazzed up a bit with a slightly rounded lens (I bought mine at Macy's on sale for only $99!)

What are some of your summer essentials? I'd love to hear! PS - most of these items fit one of the Sustainable Living credos: Either it is made from organic, all-natural, and/or sustainable materials; is an American company; is made in America (particularly by individual craftspeople and independent companies) and/or; donates regularly through a charitable giving program.

Wednesday, June 29, 2011

Freezing Strawberries

As marvelous and rewarding as berry picking is, it always brings a bit of melancholy. Fresh berries only last for so long, and once they are gone, they are gone. We wait an entire year to eat freshly harvested berries again.


Don't despair. If you haven't perserved a bit of summer by making jam, you can always freeze fresh berries to enjoy year-round. It's a simple process, but you'll need to make sure you have plenty of space in your freezer (so get ready to compost the box of waffles and frozen dinners that hit their expiration dates a year ago.

********************
Freezing Strawberries

1. Wash berries and remove hulls. Cut in half, or if preferred, leave whole.


2. Place berries in a single layer on a cookie sheet (or any sort of flat surface like a tray or baking dish - just be sure that it is safe for the freezer).


3. Place berries in freezer and allow to freeze for at least three hours or overnight. Once berries are frozen, remove from cookie sheet and place in freezer bags or containers. Berries will last in freezer for at least a year (provided you don't eat them before then!). This method works for any type of berry (I heard from an acquaintance that if you freeze blueberries or elderberries, then vacuum-seal them, they have the taste and texture of fresh berries!).

Thursday, June 23, 2011

Container Herb Garden


Just because I live on a farm does not mean I can't appreciate a nice container garden! We have an old whiskey barrel that sits atop a tree stump just off the kitchen porch - the perfect place for an easy access herb garden. I also refer to this as "Edie's garden," as I have found that if she helps out with the garden, she's more likely to eat what comes from it.


Container gardening is a great sustainable solution for those with limited space (or those with a lot of space who just want easy access). While you can use any combination of containers that works for you, I like to have one big container for all my herbs (you would be surprised how many herb plants can fit!). Here are the steps:

1. Choose a container that is large enough to hold all of your herbs (go for something eco-friendly, like a BPA-free recycled plastic composite, terra cotta, or even vintage whiskey barrel (it's food safe!)). You don't want anything too heavy, unless you are going to plant it in place.

2. Create a good drainage system in your container by drilling small holes in the bottom of the pot (some might come with drainage holes) or lining the bottom of the container with one inch of rocks or gravel.

3. Fill the container within two inches from the top with a good, organic potting soil. Boost the soil's performace with an organic vegetable fertilizer (follow manufacturer's instructions for proper soil-to-fertilizer ratios).

4. Lay out your plants until satisfied with the placement. Using your hands, a dibble, or a small garden trowel, dig holes for the plants and place in the soil (be sure to scarify, or loosen and break up, the roots of the plants). Pat some potting soil around the base of the plant to secure it. Taller plants (like dill and rosemary) should be planted in the center or back of the container, with shorter or trailing herbs (like mint or thyme) on the sides or front. Water thoroughly.


I keep the garden marker with the plants to help identify them

That's it! Easy, right?! Be sure your container herb garden gets plenty of sunlight and water it whenever the soil becomes dry (usually everyday to every-other day, depending on the weather). In my whiskey barrel, I planted dill, rosemary, Mexican oregano, sage, common thyme, lemon thyme, pineapple mint, spearmint, peppermint, apple mint, marjoram, and tarragon. In the empty spaces, I planted strawberries. Afterall, this is Edie's garden, and she really likes picking strawberries. I planted basil, parsley, horehound and catnip in the "big" garden, but really enjoy having herbs right off the kitchen for quick additions to recipes.

If you try to create a container herb garden, send me a picture or a link! I would love to see it. This is a great way to make the most of a small space, perk-up cooking, and introduce kids to gardening.

Monday, June 20, 2011

Strawberry Salad

Salad greens from my mother's garden; berries picked by me

Two words indicative of summer are strawberry and salad. Put them together, and experience a flavor profile that is reminiscent of running barefoot through sprinklers, making s'mores, getting sun freckles on one's shoulders, and backyard camping in rickety tents. This Strawberry Salad is a quick, easy meal that can be whipped up for a tasty lunch or healthy dinner. Enjoy!

********************

Strawberry Salad with Candied Walnuts
Serves Two

5 cups (for me, about 4 big handfuls) salad greens, washed and dried
1/2 cup red onion, sliced
1/3 cup feta cheese, crumbled*
1/2 cup sliced strawberries
1/2 cup walnuts, shelled and halved
1 egg white
1 tablespoon sugar
1 teaspoon cinnamon
1/2 teaspoon cloves
1/2 teaspoon paprika
1 1/2 tablespoons extra virgin olive oil
1 tablespoon balsamic vinegar
Salt and pepper, to taste

1. Preheat the oven broiler (or set oven to 500 degrees Fahrenheit). Combine egg white, sugar, cinnamon, cloves and paprika. Add nuts and mix with fork. Place nuts on a foil-lined cookie sheet and bake for 10 minutes or until golden.

2. Meanwhile, combine the salad greens, red onion, cheese and strawberries. Once walnuts are done, sprinkle on top of salad. Drizzle with balsamic vinegar and olive oil. Season as desired with salt and pepper.  Serve immediately.

*Bleu cheese would also be delicious!

Strawberry Jam

While May is National Strawberry Month, the juicy, red fruits don't hit their prime in the Northeast until June. Strawberries were at peak ripeness last week, so Edith and I went picking.


One of the best ways to ensure you capture a bit of summer is to make Strawberry Jam. The house smelled heavenly all weekend long with the aroma of jam stewing on the stove (something I look forward to all year long). Many people think jam is an overly-complex process. Truth is, you can't really screw it up. If it turns out too thin and runny, it becomes ice cream topping. If too thick, spread it into a parchment-lined 9"x13" pan, cut into 1-inch squares, sprinkle with sugar, and you have jelly candies. Jam does take a little time, and needs to be stirred often to prevent burning (but I just try to catch-up on emails or get through the stack of magazines in the kitchen while the jam is cooking). Here is a simple, all-natural jam recipe I hope you will try.

********************

Strawberry Jam
Makes About 5 Pints*

8 cups strawberries, washed, hulled and quartered
5 cups white sugar
1 1/2 cups peeled, cored and grated apples (like Granny Smith - about 3 apples)**
2 tablespoons Grand Marnier (or any kind of quality orange liqueur or Triple Sec)***
2 teaspoons Kosher salt

1. In a large pot, combine all ingredients. Cook over medium-high heat until a boil forms. Stir frequently with a wooden spoon.

2. Reduce heat to medium. Cook, stirring and scraping the bottom of the pan frequently, until bubbles become larger and slower (about 45 minutes to an hour). Jam should reduce to a little more than half to be considered done, or read at 220 degrees Fahrenheit on a candy thermometer.

3. Remove from heat and immediately ladle into hot jars or other containers. The jam can be canned (either in a hot-water bath or pressure canner, just follow manufacturer's recommendations) or refrigerated for about two weeks.

*This recipe can easily by halved to 4 cups strawberries, 2 1/2 cups sugar, 3/4 cup apples, 1 tablespoon Grand Marnier, and 1 teaspoon salt.

**This recipe uses no commercial pectin. Apples are a natural source of pectin and help to thicken the jam.

***Orange or lemon juice is a fine alternative.

Stay tuned for more strawberry recipes (and be warned... June is National Dairy Month, so look out for recipes utilizing my favorite food group!).


Thursday, June 10, 2010

Blueberry Buckle


My parents were at the farm over the weekend, and whenever they come I always make sure to feed them. The main reason they come to visit is, of course, to play with their grandkids, but I usually have some project I need them to help me with when they are here. Making sure my folks are well-fed is a small price to pay for their help. Plus, I don't want them to start thinking I only keep them around for the cheap labor (just kidding, Mom and Dad!).

So, this weekend, I made a meal of yummy vegetable pasta salad, grilled corn-on-the-cob with a little lime butter, and London Broil marinated and seasoned in the Montreal style and cooked to medium over slow-burning charcoal. But to me, no meal is complete without something sweet at the end. I needed to whip up dessert quick, and also had fresh, plump, richly indigo blueberries on hand.

I decided to make this delicious Blueberry Buckle. I found the recipe in the Ginsberg's Cookbook that celebrates the company's 100th anniversary (Ginsberg's Foods was one of my clients, and I assisted them in the planning and publicity of their 100th anniversary celebration. Hi Nancy and David!!). The recipe is so easy, and the results are divine (this was my first buckle, and I think it turned out great).

****************************************
Dot's Blueberry Buckle

2 cups flour
2 teaspoons baking powder
1/2 teaspoon salt
3/4 cup sugar
1/4 cup butter
1 egg
1/2 cup milk
1 cup fresh blueberries*
Crumb Topping (recipe follows)

Mix dry ingredients together. In a separate bowl blend sugar and butter until creamy; then add egg. Alternate adding dry ingredients and milk to egg mixture.** Fold in blueberries, batter will be thick. Pour batter into round greased cake pan. Equally distribute crumb topping over cake batter. Bake at 375 degrees for 40 minutes. This recipe doubles easily.

*****************************************
Crumb Topping

1/2 cup sugar***
1/2 teaspoon ground cinnamon****
1/4 cup flour
1/4 cup butter, softened

Using a pastry cutter, blend ingredients.

*I think you could use frozen blueberries for this, but allow them to thaw and drain before use. Too much liquid will make this buckle heavy and soggy

**When alternating wet and dry ingredients, be sure to always incorporate dry ingredients last. This ensures the smoothest batter.

***I used brown sugar in this recipe, just because I could :-)

****I also doubled the cinnamon, again, just because.

*********************************************


I think this is best served warm with a dollop (or two... or four) of homemade sweetened whipped cream. I add a little vanilla to mine. This buckle is very reminiscent of a light and airy blueberry muffin, but the crumb topping sweetens it to dessert level.

Ever had a "buckle" before? Do you prefer simple Americana desserts like this, or sweets that are more complex and indulgent?