Showing posts with label Sundays on the Sunporch. Show all posts

Monday, May 23, 2011

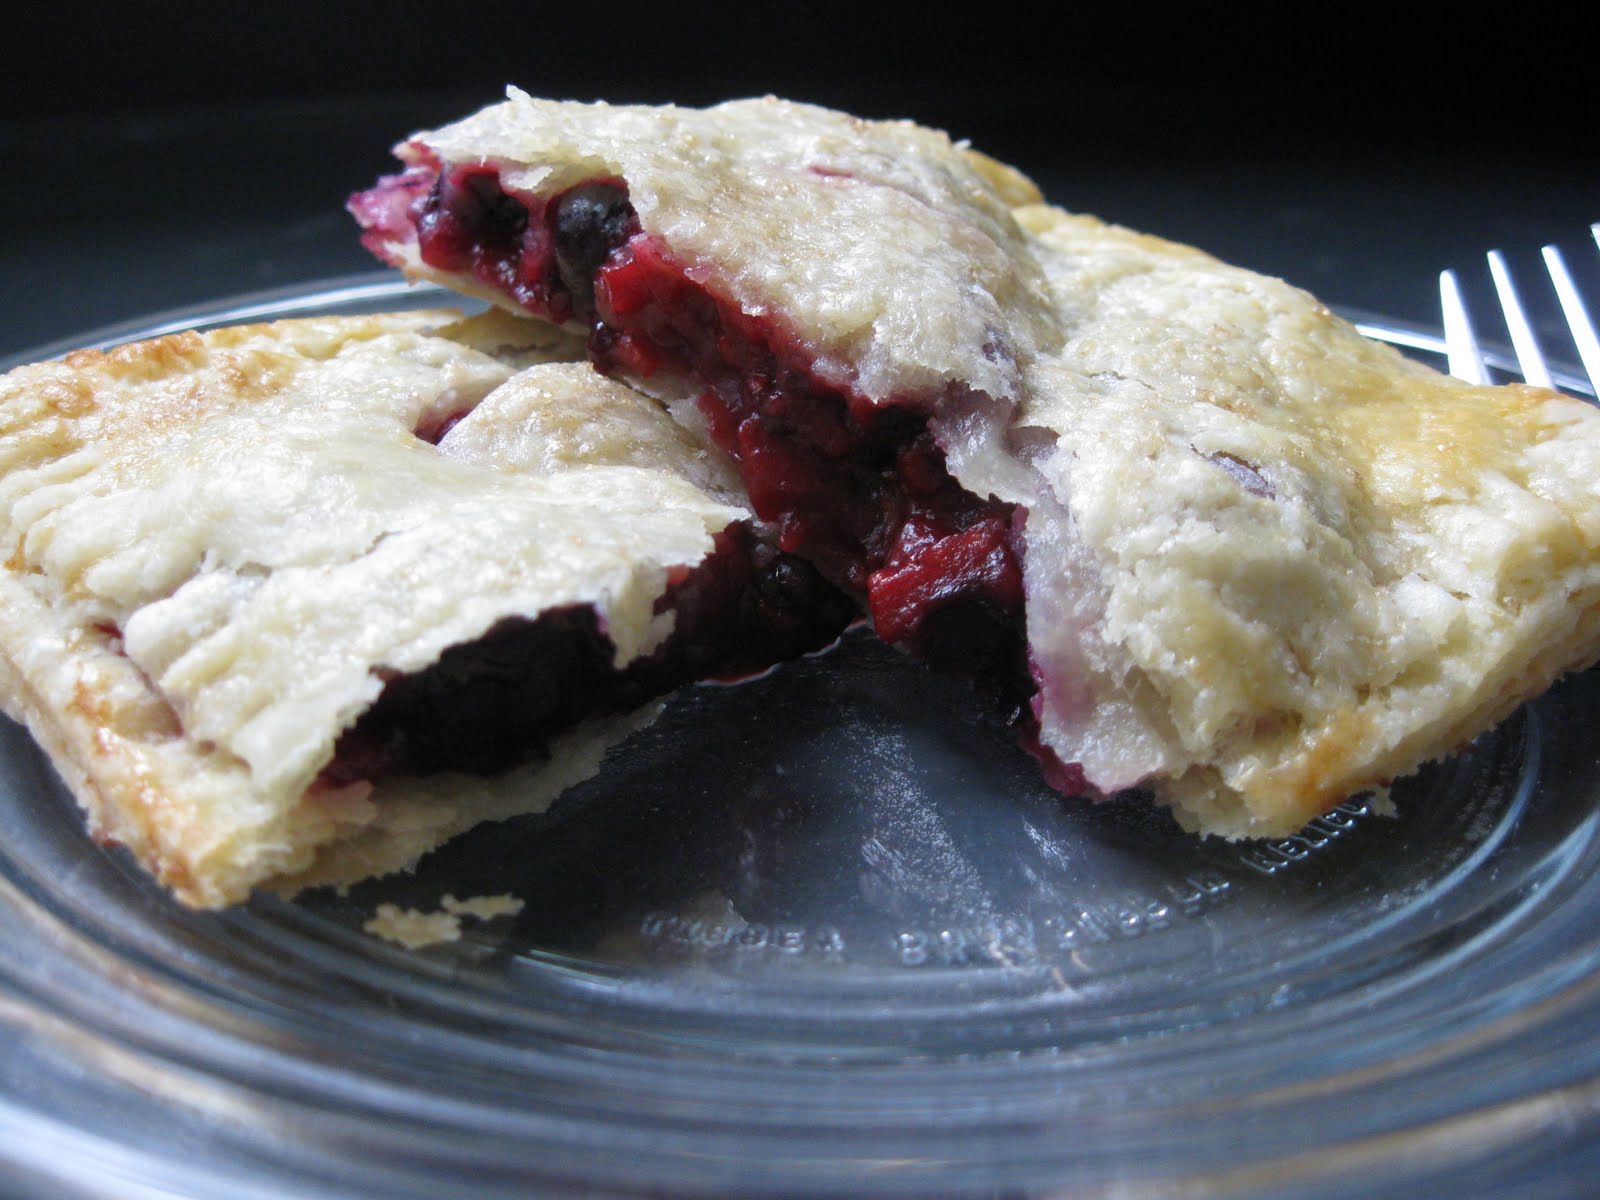
Sundays on the Sunporch: Three Berry "Pop-Tarts"


Now that spring is here and the weather is beautiful (save for all the rain we've been having), it's time to re-instate Sundays on the Sunporch. This is one of my favorite little traditions Dave and I have started for our family. Just lazing around on the sunporch, testing out a new breakfast/brunch recipe with a full pot of French Press, and enjoying each other's company.

Yesterday, Edith and I tried our hands at homemade three berry "Pop-Tarts." I think deep-down we all secretly love Pop-Tarts (or the childhood nostalgia that surrounds them). This recipe provides a glimpse into the classic shelf-stable breakfast food but elevates it to something you can actually feel good about eating. If you prefer, you can make a simple milk glaze (two parts confectioners sugar to one part milk - whisk until smooth) to drizzle on top of the pastries once cooled slightly, but I like them straight-up.


My little helper, Edie. She brushed the egg wash on the dough and
 assisted with mixing. And yes, she also likes to wear a sand pail as a hat

********************
Three Berry "Pop-Tarts"
Makes 6 servings

For the Dough*
2 cups flour
1 teaspoon salt (preferrably sea salt)
2 tablespoons white sugar
1 cup (2 sticks) plus 2 tablespoons cold butter, cut into small cubes
1/4 cup ice water
1 egg
1 tablespoon cream or milk
Raw/Demerara sugar

For the Filling
1 1/2 cups berries of choice (I used raspberries, blueberries and blackberries)**
1/2 cup sugar
2 tablespoons flour
Pinch of salt
1 teaspoon cinnamon
1/2 teaspoon nutmeg

1. Heat oven to 400 degrees Fahrenheit. Prepare two baking sheets with parcement paper or Sil-Pat mats.

2. In a large bowl, combine dough allowances of flour, salt, and white sugar. Whisk to combine. Cut-in butter using a pastry blender or hands.

3. Add water (but not ice!) a tablespoon at a time. Add/reduce recommended about based on the point the dough just forms a ball.

4. Cover dough an refrigerate for at least 30 minutes.

5. In a new bowl, mix filling ingredients together, macerating the berries slightly to release juice. Be sure flour is well-mixed with berries.

6. Once dough is chilled, remove and roll out into a large rectangle 1/4-inch thick (cut dough in half if needed and roll each half separately). Be sure the rolling pin and surface are both well-floured.

7. Using a knife or pastry wheel, cut dough into twelve rectangles.

8. Mix egg with heavy cream to form an egg wash. Brush egg wash onto the edges of all dough rectangles.

9. Spoon filling onto half of the dough rectangles. Cover with other half of dough rectangles. Push edges together with fingers, then crimp or seal with the tines of a fork.

10. Brush remaining egg wash on the top of the pastries. Sprinkle with raw sugar. Pierce the top of the pastries with a knife to make three small steam holes.

11. Place pastries on prepared baking sheets, bake for 10-15 minutes or until edges and golden brown.

Pastries can be wrapped in waxed paper, stored in a Ziploc bag or storage container, and placed in the freezer for up to three months. They can be re-heated in the oven or in the toaster (it might take two "rotations" in the toaster if frozen). I think I might also make these for a summertime dinner party with a sprig of fresh mint and homemade vanilla ice cream as a dessert! Ooo, the possibilities.

* The dough recipe is adapted from La Buena Vida.

** Do not hesitate to use frozen berries. In my opinion, it is better to pick (or buy) fresh fruit locally and freeze it (or buy bags of frozen fruit from the grocer) than to buy fresh supermarket berries grown halfway around the world. Fresh doesn't always mean better!

Friday, June 11, 2010

Sundays on the Sunporch: Buttermilk Scones


So, you're back for round 2 of "Sundays on the Sunporch," eh? Glad you liked what you saw earlier, and I hope you'll find joy in this recipe, too.

This recipe is something I turn to again. And again. And again. It's virtually no-fail, and I've created so many different versions of this same basic recipe, that the cookbook falls open right to the "scones" page on it's own (the opposite page bears the recipe for baking powder biscuits - another favorite at Silly Goose Farm). The preface of this recipe says it all: "Think of scones as British biscuits. They are made in a manner similar to biscuits and, in fact, share biscuits' buttery-layered texture, but their name, their shape, and the fact that they're served with tea rather than gravy lift them to the level of fancier fare." There are many ways to prepare scones. You can add basically anything to them (chocolate, dried fruit, whatever your mood presents), and serve them in many ways (in the American style, with coffee and jam, or Brit-like with tea and clotted cream). This recipe comes from none other than our beloved Jooolia (you must say it as you hum, and as if you've had a martini or two, in the classic Julia way), via Baking With Julia, written by Doria Greenspan.
*****************************************

Buttermilk Scones
Makes 12 triangular or 24 rolled scones

3 cups all-purpose flour
1/2 cup sugar
2 1/2 teaspoons baking powder
1/2 teaspoon baking soda
3/4 teaspoon salt
1 1/2 sticks (6 ounces) cold unsalted butter, cut into small pieces
1 cup (approximately) buttermilk
1 tablespoon grated orange or lemon zest
1/2 stick (2 ounces) unsalted butter, melted, for brushing*
1/4 cup sugar, for dusting**
4 tablespoons jam or jelly and/or 4 tablespoons diced or small plump dried fruits, such as currants, raisins, apricots, or figs for filling (optional)***

1. Position the over racks to divide the oven in to thirds and preheat the over to 425 degrees Fahrenheit.

2. In a medium bowl, stir the flour, sugar, baking powder, baking soda, and salt together with a fork. Add the cold butter pieces and, using your fingertips (the first choice), a pastry blender, or two knives, work the butter into the dry ingredients until the mixture resembles coarse cornmeal. It's OK if some largish pieces of butter remain - they'll add to the scones' flakiness.

3. Pour in 1 cup buttermilk, toss in the zest, and mix with the fork only until the ingredients are just moistened - you'll have a soft dough with a rough look. (If the dough looks dry, add another tablespoon of buttermilk.) Gather the dough into a ball, pressing it gently so that it holds together, turn it out onto a lightly floured work surface, and knead it very briefly - a dozen turns should do it. Cut the dough in half.

4. To make triangular-shaped scones: Roll one piece of the dough into a 1/2-inch-thick circle that is about 7 inches across. Brush the dough with half of the melted butter, sprinkle with 2 tablespoon of the sugar, and cut the circle into 6 triangles. Place the scones on an ungreased baking sheet and set aside while you roll our the rest of the dough.

5. To make rolled scones: Roll one piece of dough into a strip that is 12 inches long and 1/2 inch thick (the piece will not be very wide.) Spread the strip with half of the melted butter and dust with half of the sugar.
If you want to spread the roll with jam and/or sprinkle it with dried fruits, now's the time to do so; leave a narrow border on a long edge bare. Roll the strip up from a long side like a jelly roll, pinch the seam closed and turn the roll seam side down. Cut the roll in half and cut each piece into six 1-inch-wide roll-ups. Place the rolled scones cut side down on an ungreased baking sheet, leaving a little space between each one. Repeat with the remaining dough.

6. Bake the scones for 10 to 12 minutes, until both the tops and bottoms are golden. Transfer the scones to a rack and cool slightly. These are best served warm but are just fine at room temperature.

7. If you're not going to eat the scones the day they are made, wrap them airtight and freeze; they'll stay fresh for a month. To serve, defrost the scones at room temperature in their wrappers, then unwrap and reheat on a baking sheet for 5 minutes at 350 degrees Fahrenheit.

*I use a simple egg wash (1 egg and a tablespoon of milk, cream or water, beaten together) in place of the melted butter, brushed on top of the scones just before baking to give a beautiful golden sheen.

**I like using Demerara, or raw, sugar for this type of baking. When sprinkled on top of the scones, it adds a subtle crunch without deterring from the flakiness.

***I added about 5 ounces of chocolate chips to the scones for a little extra "deliciousity." Be sure to use a good-quality chocolate, as lesser brands often contain high amounts of vegetable wax which causes the chocolate to not melt thoroughly.
************************************************

 This cake stand was a wonderful Christmas present from my darling husband, and can be found here 

Thursday, June 3, 2010

Sundays on the Sunporch: Streusel Cupcakes


It's always nice to have one day a week to just bum around, isn't it? I think that is what Sundays are for. Wake up. Maybe change out of your jammies. Read the paper. Spend time with the ones you love. So on Sundays at Silly Goose Farm, Dave and I are hanging out with the kiddos on the kitchen sunporch. And since I have tons of cookbooks to test and recipes to try, I've decided to wake up a little earlier on Sundays and try a new, tasty morsel for us to enjoy.


The first recipe in this series comes from everyone's favorite domestic diva... the one, the only, Marthaaaa Steeewaart! (just say it as if you're the announcer at a professional wrestling match - you'll get the idea). We call her "Marfa" around here. For our anniversary, Dave gave me the Martha Stewart's Cupcakes book. I couldn't wait to try all the delicious (and adoreable!) recipes, and though the Streusel Cupcake option was perfect for Sunday brunch on the sunporch.
........................................................................
Streusel Cupcakes
(Makes 24)*

2 1/2 cups all-purpse flour
1/2 teaspoons baking soda
1 1/4 teaspoons baking powder
1/2 teaspoons coarse salt
1/2 cup plus 2 tablespoons (1 1/4 sticks) unsalted butter, room temperature
1 cup sugar
3 large eggs
1 1/2 teaspoons pure vanilla extract
1 1/2 cups sour cream
Streusel Topping (see recipe below)
Milk Glaze (see recipe below)

1. Preheat oven to 350 degrees. Line muffin tins with paper liners. Whisk together flour, baking soda, baking powder and salt.

2. With an electric mixer on medium-high speed, cream butter and sugar until pale and fluffy. Add eggs, one at a time, beating until each is incorporated, scraping down sides of bowl as needed. Stir in vanilla by hand. Add flour mixture and sour cream; stir until just combined.

3. Divide batter evenly among lined cups. Sprinkle half the topping over cupcakes, gently pressing it into the batter. Sprinkle evenly with remaining topping. Bake, rotating tins halfway though, until golden brown and a cake tester inserted in centers comes out clean, about 20 minutes.** Transfer tins to wire rack to cool completely before removing cupcakes.

4. To finish, place cupcakes on a wire rack set over a baking sheet; drizzle evenly with milk glaze. Glazed cupcakes can be stored up to 3 days at room temperature in airtight containers.
.......................................................................
Streusel Topping
(Makes enough for 24 cupcakes)

2 1/4 cups all-purpose flour
3/4 cup packed dark brown sugar
2 1/4 teaspoons ground cinnamon
3/4 teaspoon coarse salt
1/2 cup plus 2 tablespoons (1 1/4 sticks) unsalted butter, room temperature

Whisk together flour, brown sugar, cinnamon, and salt; cut in the butter using a pastry blender, your fingertips, or two table knives until combined but still crumbly. Refrigerate 30 minutes before using.
.....................................................................
Milk Glaze
(Makes enough for 24 cupcakes)

1 1/2 cups confectioners' sugar, sifted***
3 tablespoons milk

Whisk together ingredients until smooth. Use immediately.

*I used a larger muffin tin, so I ended up with 12 cupcakes. I thought this was the perfect serving size for a light, quick breakfast or brunch option. However, if I was serving this at a more formal brunch, I would stick with the standard cupcake size.

**I ended up baking these little buggers for closer to 30 minutes, since they were the bigger size. BTW - I'm sure Marfa has endless cake testers at her disposal, and I'm sure they're all gold-plated, but I use toothpicks or wooden skewers, and those work just fine.

***I though the glaze was a little thin, so I added 1/4 cup more confectioners' sugar. I think adding a 1 tablespoon of coffee or maple syrup to the glaze would be a really nice addition, in which case reduce the milk by 1 tablespoon.

I can't wait to dig up more recipes and continue this tradition. Of course, dear friends, you are always invited to come join us. We would love to have you!

What do you do on Sunday mornings? Is there another day of the week that is your "relaxation" day? I would love to hear!