Monday, April 23, 2012

A Night of Cheese: First Course


The first course in A Night of Cheese featured one of my favorite cheeses - Fresh Goat's Milk Cheese from Coach Farm (Pine Plains, NY). The cheese was smooth and creamy with a little bit of tang on the finish. Its most notable feature was probably the creaminess, which coated the entire palate, but a close second would be the grassy notes that proved how fresh the cheese really was. Each diner received half of a two ounce cheese "button" alongside a candied orchid. The hardened sugar on the orchid provided a nice crunch to contrast with the cheese, while the floral qualities highlighted the "grassiness." Diners simply plucked off the petals to enjoy with each bite of cheese.

The beverage pairing was a Non-Vintage Cuvee M from Mumm Napa (Rutherford, CA). This demi-sec sparkling wine featured particularly small bubbles and a long finish, which were excellent for cleansing the palate and cutting the creamy texture of the cheese. For more info on sparkling wine dryness, read this post.

I really loved this course. It was the perfect jumping off point for the rest of the evening. The candied orchids were an elegant touch that could not have been simpler to make. Try making a batch of candied edible flowers to decorate cakes and other baked goods! (Besides orchids, other edible flowers include herb and fruit blossoms, violets, johnny jump-ups, carnations, lilacs, nasturtiums, English daisies, marigolds, and hollyhocks, among others.)

********************
Candied Flowers

One egg white (or powdered egg whites - mix according to manufacturer's instructions)
Castor sugar or superfine sugar
Edible flowers

1. Select your flowers. Be sure to choose flowers that have been grown for culinary purposes without pesticides and that are blemish free (you want them to look pretty, after all!). Wash them gently or wipe with a wet sponge to remove any dirt. Allow to air dry.

2. Beat an egg white until slightly frothy. With a small clean paintbrush, lightly coat each flower (front and back) with the egg white (work in batches to avoid the egg white drying too fast on the flower).

3. Coat each flower thoroughly with the sugar. To make your own superfine sugar, pulse white granulated sugar in a food processor several times (be careful - don't turn it into powdered sugar!).

4. Allow each flower to dry for 12-24 hours on a baking sheet lined with wax paper. Store in an airtight container until ready to use. Candied flowers will last up to three months in a cool, dry environment. Avoid eating the white base of each flower, which tends to be bitter.

A very special thanks to Eric Paul, The Cheese Traveler, for his expertise. Without him, this night would not have happened! Be sure to follow him on Facebook. Coach Farm goats milk cheese can be purchased through The Cheese Traveler or at any of these establishments.

A Night of Cheese


I recently hosted a truly magical evening at Silly Goose Farm. With the help of my friend Eric Paul (aka The Cheese Traveler), I invited a group of fellow foodies to the farm for an intimate evening of cheese! The "Night of Cheese" was  a six-course cheese tasting (with full beverage pairings and accouterments) that went beyond the normal parameters of a "tasting" and broke into workshop territory. I think the attendees learned more about cheese than they ever thought possible! Eric explained how each cheese was made and the style and history of each offering, plus suggested other potential pairings and the best practices for assembling a cheese plate. Our tasting focused on the sweeter side of cheese and opened minds to the power of cheese for dessert!


I set the table simply - white linens, my collection of Bell Flower china and mismatched silver flatware, new and vintage stemware, and a recent acquisition of antique Anchor Hocking green glass tumblers. Menu cards were wrapped around each napkin, and I made itty-bitty notepads that I fastened to the inside of the menu cards so that guests could write down tidbits of information from the evening. White tulips in old salt and pepper shakers and lots of (unscented) candles finished the table.

The menu of the evening was as follows:

First Course: Fresh Goat's Milk Cheese (Coach Farms, Pine Plains, NY), Cuvee M (Non-Vintage, Mumm Napa, Rutherford, CA), Candied Orchids
Second Course: Eclipse (R&G Cheesemakers, Cohoes, NY), Sancerre (2010, Domaine Des Vieux Pruneirs, France), Orange Marmalade, Toasted Pistachio
Third Course: Manchester (Consider Bardwell Farm, West Pawlett, VT), Ommegang Witte (Brewery Ommegang, Cooperstown, NY), Walnut Praline
Intermezzo: Lemon Sorbet
Fourth Course: Battenkill Brebis (3-Corner Field Farm, Shushan, NY), Syrah (2008, Magnificent Wine Company, Columbia Valley, WA), Fresh Pear with Balsamic-Steeped Cherries
Fifth Course: Rupert (Consider Bardwell Farm, West Pawlett, VT), Cornelius Applejack (Harvest Spirits, Valatie, NY), Chocolate Chantilly
Sixth Course: Seaver Brook Blue (Bonnieview Farm, South Albany, VT), Tawny Port (10 Year, Churchill's Portugal), Buckwheat Honey

The night was really amazing! I had the best time planning and prepping with Eric, and based on the responses of the attendees, everyone had a phenomenal time! To learn more about what The Cheese Traveler is about, what he is up to, and where he is going, please be sure to visit him on Facebook!

I'll be posting about the details of each course (with recipes!) this week, so stay tuned for more cheesy goodness.

Wednesday, January 25, 2012

How to Make Fire

Pinned Image

The last few weeks were cold at Silly Goose Farm. I mean, we were lucky to hit 10 degrees on many days, plus it was windy. There are only a few things that can beat the winter chill when it's that severe: Whiskey (preferably in Hot Toddy form), a big bowl of hot soup or stew, and a blazing fire.

Since I lurve whiskey, make a mean stew, and heat my whole house with wood, I suppose I'm well-equipped to handle the long, hash Upstate New York winters. Heating with wood is a very sustainable practice with several benefits, and as much as I love it, I sometimes don't love hauling wood into the house on especially cold and blustery days. But nothing - and I mean nothing - heats like wood. The warmth goes right down to the bone.

For many, having a wood fire is a luxury often reserved for wintertime getaways and perhaps an outdoor bonfire. Should you find yourself in a situation where you can let loose your inner lumberjack and set some logs ablaze, here's a how-to to surely make the fire-starting process easy (this method works for woodstoves, fireplaces, firepits, and chimneas).


What You Need:
-Kindling wood
-Seasoned, dry firewood
-Old newspaper
-Matches
-Ash pail
-Work gloves (unless you have grizzly lumberjack hands or don't mind getting splinters)
-A decent set of fireplace tools (most important: a shovel and a poker)

IMPORTANT!! If you haven't used your stove/fireplace in a while, have your chimney cleaned by a professional sweep to prevent a chimney fire. Regular use of your fireplace or woodstove actually helps to keep the chimney clean and free of debris.

Open the damper. The damper is a little metal flap the regulates how much air is exposed to the fire (more air, more fire). The damper is usually a little lever that sticks out from the stove pipe (on a woodstove, it's that big pipe off the top or back of a stove that leads to the chimney), at the bottom of the woodstove, or above the opening of the fire place. Outdoor fireplaces and chimneas typically do not have a damper. You will know if your damper is "closed" if you start your fire and smoke fills up your room... simply turn or pull/push your damper lever in the opposite direction to open it (the smoke will go up the chimney). You want your fire to have lots of air at first to help it ignite.


Start out clean. Unless you have hot coals in your stove (etc.) from the previous fire (which will help ignite your next fire), remove any ash that might have built up using the shovel. A layer of ash will just choke out any air that is trying to get to your fire. Place ashes in an ash pail and move outside or out of your way (nothing is harder to clean than accidentally dumped ashes). If your woodstove has an ash pan in the bottom, remove the ash from there, as well.


Add newspaper and kindling. Newspaper and kindling are essential to building a good fire because they are dry, ignite easily, and have lots of surface area for sparks and flames to take hold of. You want to alternately layer your kindling, essentially building a "Jenga" tower, with newspaper in between. Start with two to four pieces of kindling in the bottom of the stove/fireplace that are parallel to each other, and place lightly twisted newspaper between the pieces (to "lightly twist" the newspaper, grab one sheet of paper in the middle, then pull the sides down and twist once so it looks like a "log" or "stick"). Then, take a few more pieces of kindling and stack them on top of the first layer in the alternate direction in the same manner as the first layer (with newspaper). Do this four or five times in total (when I build a fire, I typically use eight-ten pieces of kindling and about eight-ten pieces of newspaper).

Light it up.  Take your matches and set them to the newspaper. Keep the doors on your stove/fireplace slightly ajar (if you have them). If you kindling doesn't seem to catch on fire, add a few more pieces of newspaper.


Add firewood. Once the kindling is starting to burn, add a few logs to the fire (start with one of two, depending on size). It is important to make sure the wood has lots of room for air to circulate around it (and draw flames up around it). Once those logs have caught fire, you can add more wood. Close the doors on the stove (and on your fireplace, if you wish). Adjust the damper and close it about halfway to maintain a good flame and to keep the heat in the house and from going up the chimney.

Maintain your fire. Each time you add more wood, be sure to open the damper, then close it halfway after a minute or two. Add wood as you deem necessary - the more frequently you add wood, the "hotter" your fire will burn. If your fire isn't burning fast enough, open the damper. If it burns too fast, close the damper. This is the best way to regulate how much heat you produce from your fire.


Extinguish your fire. The best way to extinguish a fire is to let it die out naturally. There really isn't a way to abruptly put out a fire in a stove or fireplace. Just use your poker to move the logs away from each other, close the door and open the damper - the fire will take care of itself. Be sure to keep anything flammable away from your fire. I actually leave my woodstove running when I leave the house because I know that if the door is shut, there isn't anything that can catch fire outside of it. I also make sure any furniture is several feet away from the stove so that the heat of the stove won't spark a fire on anything flammable. DO NOT throw water on your fire - you could burn yourself with steam and create a tremendous mess.

There you have it! While it might sound like a lot of steps, starting and maintaining a fire is quite simple and has great benefits. If you have any questions, please don't hesitate to leave them in the comments or share them on Facebook or Twitter! Enjoy the rest of winter and keep warm!!


Top image via Pinterest. Other images my own.

Wednesday, January 18, 2012

Resolutions

Pinned Image
For last year's words belong to last year's language and next year's words await another voice. And to make an end is to make a beginning. - T.S. Eliot

I'm happy 2011 is history. It wasn't a great year for me. Sure, many nice things happened, but overall, it seemed to be filled with disappointment and hardship, regardless of how I tried to redirect my path. 2012 is a clean slate with endless possibilities, and I'm looking forward to making the most of the next eleven-and-a-half months.

My most lovely friend Deborah knew I was having a hard time recently, and like a good friend would, she lifted my spirits with a thoughtful card that included the above quote. Bingo, I thought. This is exactly how I need to approach 2012. This year is going to be momentous in my life for many reasons: The restructuring of my personal life; the launch of a new business; the exciting adventures that lie ahead for Silly Goose Farm... the list is really endless.

I don't think I've found my 2012 voice yet. I'm working on it. I'm developing a new language all my own that will guide my actions, thoughts, and feelings through this year. I'll pull from the positive experiences of previous years, but work to re-imagine my life in only the most positive ways. I think it will brace me for any future failure or hardship I might face.

I could list out all my resolutions (and believe me, I have many), but instead I'm going to post about how I've put my resolutions into action. I'll talk about the little things (start making 2012 Christmas presents now!) as well as the big things (like my quest to drop a few lbs, among other things). Hopefully some of what I'm aiming to accomplish in 2012 resonates with your own personal goals. Perhaps we'll be each other's support system.

And who knows... maybe we'll even understand each other's unique new voices.

Picture via Pinterest

Monday, December 12, 2011

Biscotti

Sometimes I swear I should be Italian. I love the language, the culture, and especially the food. But alas, not a drop of Italian blood in this lady. I am rather homogeneous (Scots-Irish, English, Welsh, with one descendant down the line being of Apache heritage). Besides having a high tolerance for alcohol, this lineage has also led my family to be a sole supporter of Coppertone.

One Italian tradition I learned to love while visiting the country with my mother was biscotti (dipped in either espresso or wine). A few years later, while I was slinging pancakes in a local cafe, I was re-introduced to biscotti. After my waitressing shift was up I would take an espresso and piece of chocolate biscotti (technically, biscotto) to accompany me on the ride back to my apartment.

Biscotti is incredibly simple (remember: I don't make anything that's "hard") and like biscuits, if you have a good base to work from, you can expand the flavors immensely. I recently made a large batch of gingerbread biscotti and espresso chocolate-chip biscotti to send to three lovely ladies as part of the Great Food Blogger Cookie Swap. It was so fun to send out my cookies in their little tins, only to receive three batches of scrumptious goodies in return. If you missed out, don't worry, I heard the organizers will do it again next year!


Special Shout-Out: I sent my cookies to Annalise at Completely Delicious, Jewel at Eat Drink Shop Love,  and Tanvi at The Hathi Cooks. In return, I received Double Chocolate Crackles from Amber at Amber's Confections, Molasses Cookies with Orange Sugar from Emily at Back to the Cutting Board, and Dark Chocolate Cafenela Cookies from Leslie at My Kitchen is Open. Now, on to the recipe.


********************


Biscotti
Makes 20 pieces


Base Recipe
2 cups all-purpose flour
3/4 cup sugar
1 teaspoon baking powder
1/2 teaspoon baking soda
1/4 teaspoon salt
2 large eggs

1. Preheat the oven to 350 degrees Fahrenheit. Combine the flour, baking powder and soda, and salt together. Set aside

2. Beat together the eggs and sugar until combined and pale (that's how you know the sugar has dissolved). Add in dry ingredients and mix until just combined.

3. On a greased cookie sheet (this is one of the few times I actually dig out my Sil-Pat), form dough into log about three inches wide and 12-15 inches long. Bake for 25-30 minutes until lightly browned.

4. Remove biscotti from the oven and allow to cool enough to handle. With a serrated bread knife, cut the biscotti into about 20 pieces (more or less, depending on how thick you like you biscotti). Be sure to cut straight down into the biscotti to get clean cuts that doesn't cause the cookies to crumble. Arrange back on the cookie sheet and back for another 12-15 minutes until the biscotti is dry and crisp. Allow to cool on a baking sheet. Enjoy by dunking into your favorite Italian beverage.

Espresso Chocolate-Chip Biscotti
Start with base recipe, but add to egg/sugar mixture...
2 teaspoons instant espresso or coffee powder
2 teaspoons hot water
1 teaspoon vanilla extract
(or 3 teaspoons very strong espresso and 1 teaspoon vanilla extract)

After incorporating dry ingredients, add six ounces of chopped semi-sweet chocolate or mini chocolate chips. Bake as above.

Gingerbread Biscotti
Start with base recipe, but add to dry ingredients...
1/2 teaspoon ground allspice
1 teaspoon ground ginger
1/2 teaspoon ground cloves
1/2 teaspoon cinnamon
1 teaspoon orange zest

Bake as above.

Tuesday, November 29, 2011

Biscuits

PS - I made that coffee mug!!

There are certain recipes every kitchen-savvy person should have in their repertoire for last-minute emergencies. Go-to dishes that can pinch hit and are flexible enough for myriad uses and adaptations. For me, biscuits are it. They can find a place in nearly any meal and once a good basis is established, they can be manipulated to fit a whole host of scenarios. My biscuit recipe is adapted from Baking with Julia, a cookbook I'm not sure I could live without. Seriously... go buy it right now. You won't regret it.

These biscuits can be made in advanced and frozen. Just be sure to keep them in a freezer bag and remove as much air as possible to prevent freezer burn. To reheat, place them in a paper bag in a single layer, close the bag by folding up the open end and bake for 10-15 minutes in a 350 degree Fahrenheit oven.

********************
Biscuits
Makes 8 3.5" Biscuits

4 cups all-purpose flour
2 tablespoons baking powder
2 teaspoons salt (preferably Kosher)
2/3 cup vegetable shortening
2 cups milk

1. Preheat oven to 425 degrees Fahrenheit. In a large bowl, combine flour, baking powder and salt. Cut in shortening with two knives or a pastry blade. Stir in milk. Mix until just combined.

2. On a well-floured surface, turn out dough and dust with flour. Pat the dough out with hands until it is 1/2-inch thick. Fold dough in half, then in half again. Pat until the dough is 1/2-inch thick. Do this at least two more times, making sure not to overwork the dough. Folding the dough will help to give it "lift" and layers.

3. Use a 3.5" biscuit cutter to cut-out biscuits. Re-fold scraps and pat the dough out to 1/2-inch thick again (you'll probably end up with a little ball of dough left - pat it down and make it into a mini-biscuit). Brush the tops of the biscuits with an egg wash (one egg mixed with 1 tablespoon of water or milk). Let the biscuits rest for 5 minutes.

4. Place biscuits on a greased cookie sheet (or better yet, on a pizza stone hot from the oven) and bake for 12-15 minutes, or until biscuits have risen and appear golden on top. Place on a cooling rack. Enjoy!


Some more ideas: Serve these biscuits at breakfast with butter and jam or at dinner with herb compound butter (you could even dust the tops with a little herbed salt before baking). These biscuits are a great companion for strawberry shortcake - just sprinkle some sanding or demerara sugar on top of the dough after the egg wash. For a savory kick, try adding 1/2 tablespoon of dill and 1 cup of grated cheddar cheese to the dough, or add 2 teaspoons of Old Bay seasoning and use these biscuits to sop-up melted butter at a seafood bake. Herb fans should try adding sage, a la this guy.

Monday, November 28, 2011

A Silly Goose Farm Thanksgiving - 2011

Another Thanksgiving come and gone. It's hard to believe that 2011 is almost over, but I'm very much looking forward to saying au revior to this year and welcoming 2012 with open arms. Until then, how about a little retrospective on the 2011 SGF Thanksgiving celebration?


This year's dining crew was the same as last year's, except Eric was big enough this year to sit at the table with us (well, sort of at the table -- he kept trying to stick his hands in the mashed potatoes and dump the gravy boat over his head).


I made place cards out of cardstock, vintage bird images, and alphabet pasta (yes... alphabet pasta. Listen, I had to get some Martha OCD out at 2am on Thanksgiving while the pumpkin pie was cooking, okay?). I used a similar method to make a "pie banner" (see pictures below). I got my inspiration here.


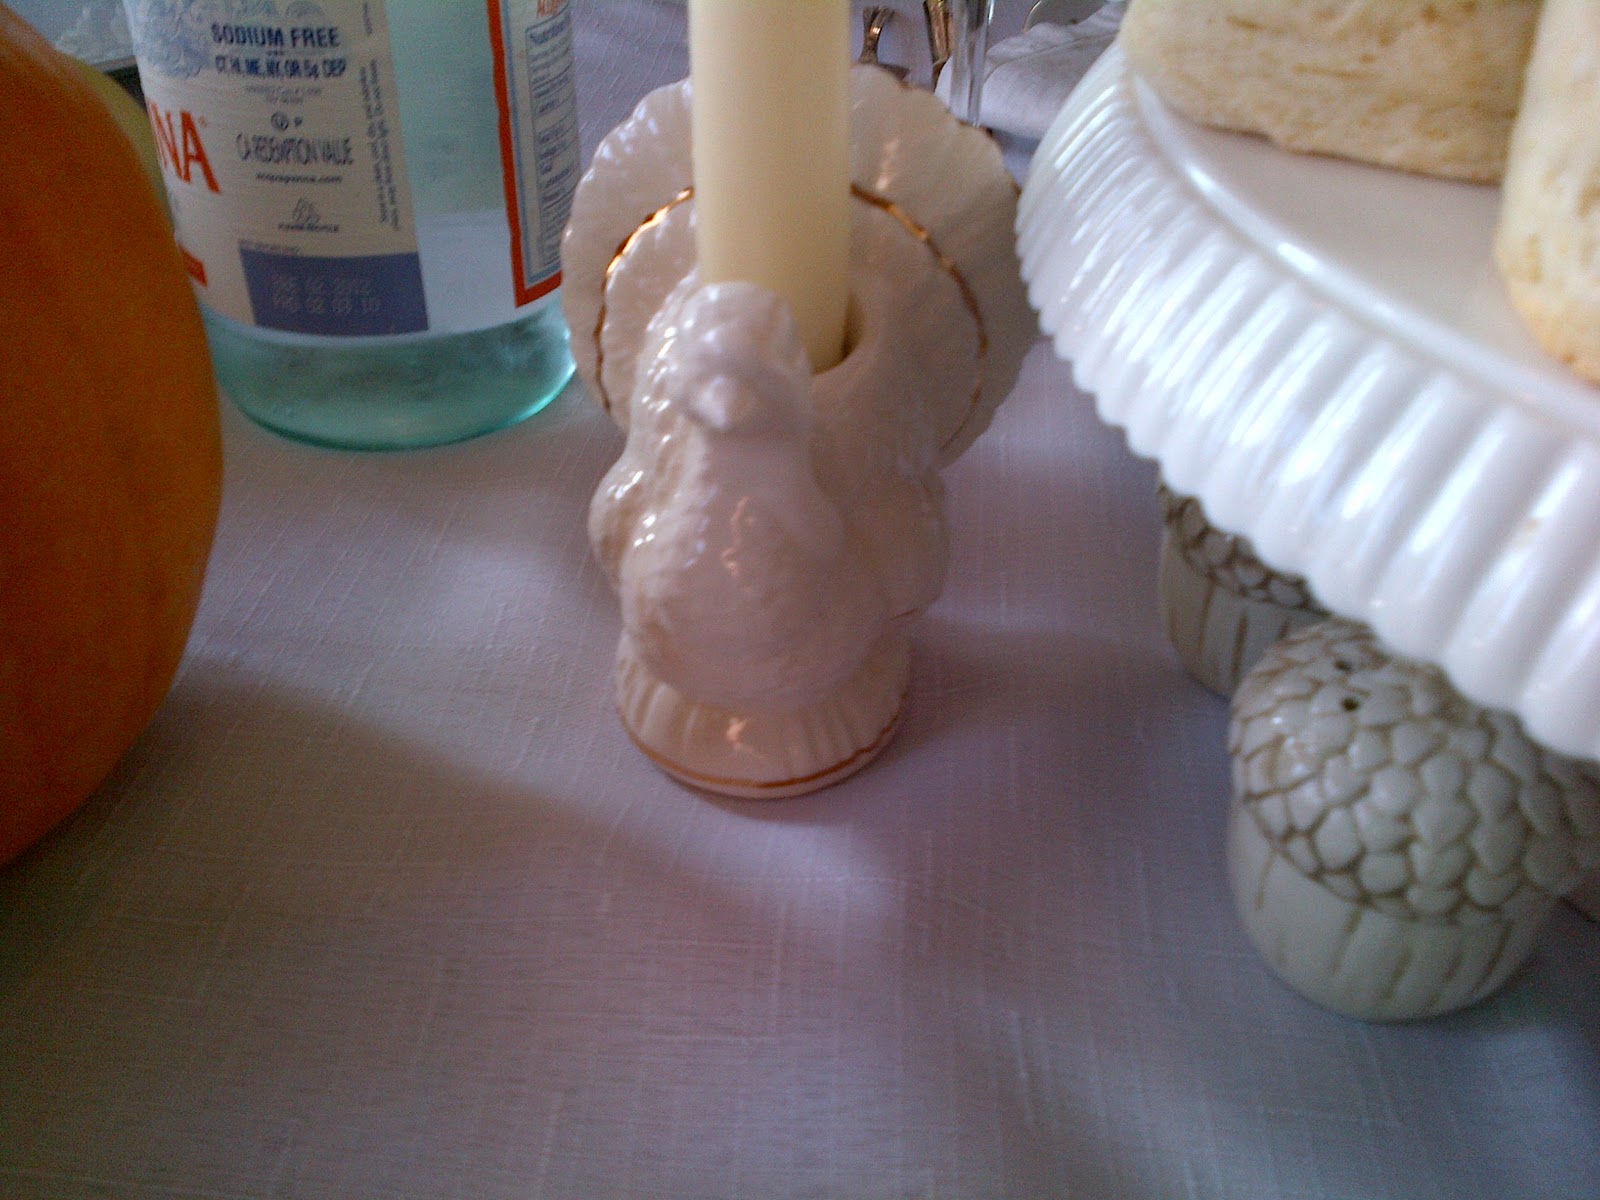
I tried to keep the tablescape relatively un-fussy. Some pumpkins and gourds for centerpieces, plus my turkey candlesticks I thrifted from Goodwill, paired with fresh-pressed linens. My $30 collection of antique china, vintage silver, and wine glasses topped of the look.


The menu wasn't too complicated, either (and almost all ingredients came from within 150 miles of our table). Here's what I made:

Maple and Cider-Glazed Turkey
Mashed Potatoes
Apple, Onion and Sage Stuffing
Pan Gravy
Brussels Sprouts with Bacon and Grapes
Roasted Carrots
Biscuits
Herb Compound Butter
Pumpkin Pie
Chocolate Cream Pie (made by my mom)
Vanilla Whipped Cream
Vanilla Ice Cream

Rub some herb butter under the turkey skin and roast it breast-down for maximum juiciness

Brussels Sprouts - Best part of the meal

The feast came together pretty well! Except that my oven went on palliative care mid-point in cooking the turkey, so I had to microwave the poor bird. Based on how moist and tender the gobbler actually turned out, I might nuke the turkey every year! Thankfully, that was the only hiccup of the day (unless you count my temper-tantrum in the kitchen when I noticed the turkey was uncooked and the fact that the dog almost ate half the meal off the table before we sat down). We paired the meal with a lovely Sparkling Riesling. A few more pictures to illustrate:

Based on this face, the meal was either really good or completely awful


Edith playing with her food...

...and Grammie threatening her.

I hope you had a lovely Thanksgiving feast, too, and that you have counted all your blessings many times over. This year, I'm especially thankful for my independence and will to always strive to be better and achieve great things. I think that theme will continue into 2012 (and of course, I'm always thankful for my family, friends, and lovely readers like you! Thanks for reading along :-). I posted some ideas for a secular grace over on the Eat Local blog, if you'd like to take a look. If you have questions or requests for recipes, please leave a note in the comments or find me on Twitter or Facebook. Now... bring on December!

Thursday, October 27, 2011

Guest Room Essentials

Hosting houseguests can be scary and daunting. Questions will undoubtedly run through your head; questions like Are the sheets soft enough? Does it smell funny in here? How will they find the bathroom light switch? Will they be hungry when they arrive? I ask myself these questions (somewhat obsessively) when friends and family come to stay with me. I've found that by keeping a few simple guidelines in place and having a ready-to-go stash of goodies makes the process that much easier. Here are a few guest room essentials to have on hand (ps - this isn't exclusive for a guest room... these items work great for any "room" you share with your guests!)


1. Milk Bottle Jar Candle $20
2. BEELUX Mandarin and Clove Candle, $11
3. Chesapeake Bay Candle Organic Cotton Candle, $6.50
4. Vintage Quilt, $295
5. Organic Cotton Throw, $44
6. Directional Incandescent Spot Light 2-Pack, $5.50
7. LED Automatic Nightlight, 2-pack, $12.50
8. Organic Cotton Pointelle Throw, $22
9. Snowflake Nightlight, $9.50
10. Vintage Sconce Nightlight, $8
11. Organic Cotton Sheet Set, $28-$54
12. Avalon Grapefruit and Geranium Hand and Body Lotion, $9.50
13. Divine Chocolate Salt Fudge, $9.50
14. Ceramic Bud Vase, $7


Have any other essentials? Let me know about them in the comments!

Tuesday, October 25, 2011

Hosting Houseguests

WAAAY back in September I had the marvelous pleasure of hosting Liz (from Octavia and Brown) and Tara (of The Prippy Handbook) at Silly Goose Farm for a few days. I absolutely adore both ladies and I'm so lucky that I get to call them my friends. While both gals are the easiest house guests ever, I still wanted to make them feel welcome and especially special. Here are some helpful, sustainable tips for hosting overnighters at your home that prove useful for me!

Pinned Image

1. Make sure your space is clean. This is probably a given, but eliminating the dust bunnies from under the bed shows you care about your guests' comfort. It also helps deter any allergic reactions that your guest might have (no one wants to be sneezy from dust and dander). To that point...

2. Use neutral cleaning products. Make a concerted effort to use natural, eco-friendly agents when tidying up your home and doing laundry. Some detergents and products rely on harsh chemicals and overwhelming scents to create the "clean" feeling. You can clean just about anything with a little borax, salt, vinegar, water and/or essential oils. The fabulous Kate Payne has some great suggestions on her website. I'll be posting my own all-nautral, homemade cleaning remedies soon!


3. Find ways to brighten up your space. Fresh flowers and soft candlelight are great ways to do this. If guests have a problem with the flowers, it's easy to remove them. Invest is long lasting, lightly-scented or non-scented candles that are soy- or natural/beeswax-based.

Pinned Image

4. Don't let your guests get bored at night. Visit your local library and check out some magazines that suit your guests interests or highlight local places and spaces. Some libraries even have bins of magazines they are looking to unload, so grab some for yourself, as well. (bonus - it's free!) You could even check out some DVDs or music for your guests' enjoyment.

Pinned Image

5. Anticipate your guests needs. I'm not saying suddenly become clarvoyant and read their minds. But think about what they might need while at your home. I like to keep a basket with toiletries (extra toothbrushes, lotion, asprin), a few snacks, and a bottle of water or two in the guest room (I also throw in other little things, like lint rollers, for "just in case" situations). What a relief it will be for your guests when they can turn to that basket for a forgotten necessity after a long day of travel! Another helpful trick - leave a basket of blankets, quilts or pillows available for your guests in case of a chilly night. These things make all the different, I promise you.

Pinned Image

6. Keep local information handy. Have a few maps of your area in the above basket, or turn to Dr. Google to print off some maps and highlight local eateries and attractions. Go paperless and suggest that your friends download some smartphone apps like OpenTable, UrbanSpoon or Foodspotting to use while they explore your neck of the woods.


7. Think of the small touches. Isn't is always nice when you go to a new hotel or inn and you find mints on the pillow, or a chilled bottle of wine, or a simple note? Create that same experience for your guests. Leave a little card letting them know how happy you are for their visit. Present a simple gift (I sent Tara and Liz home with some jam. Try including a little box of chocolate or bar of soap from a local establishment to remind your guests of their time at your house). One night, I left some chocolate-chip cookies on the nightstand as a midnight snack. Think of something sweet and simple you could do to make your friends feel extra-welcomed.

9. Be sure to leave a light on. Or at least a nightlight. You don't want guests stumbling around in the middle of the night trying to find the bathroom, so put nightlights (or electric candles) out strategically to help night owls find their way.

Any other tips you can suggest? What to do you do to prepare for houseguests and weary travelers? Leave me your thoughts in the comments below, continue the conversation on Twitter, or shoot me a note on Facebook!

Images courtesy of Martha Stewart Living, Nicola Laird's Pinterest, Janey Pugh's Pinterest, and Mariah Hermsmeyer's Pinterest

Tuesday, October 18, 2011

Tomato-Braised Short Ribs and Creamy Parmesan Polenta... And A Giveaway!


Here in Upstate New York, fall has certainly arrived. The leaves are stunning this year (some of the most vibrant reds and oranges I have seen in years) and when the sun goes down, the house begs for the warmth of a wood stove. Autumn is also the time when slow cookers come out of the cupboard and the smells of stews and braised meat waft through the house (I'm getting hungry just thinking about it). How about some delicious braised short ribs? I posted my Tomato-Braised Short Ribs and Creamy Parmesan Polenta recipe over on the Eat Local blog... I hope you'll check it out. While the meat cooks away in the oven for a few hours, this dish really only takes about 15 minutes of hands-on time, perfect for a lazy Sunday or casual dinner with friends (you can watch a movie or take the dog for a walk while it hangs out in the oven). 

But wait! There's more!

I've entered this recipe in the Calling All Cooks recipe contest, and I've been selected as a semi-finalist! But I need your help to make it to the finals. If you could, please head over to Facebook and vote for my recipe by "liking" it. The top five make it to the finals. Voting ends Wednesday, October 19th at 1pm, so you don't have long! I'd really appreciate your help.

As a thank you for your vote, please let me know in this post's comments that you voted for me, and you will be entered to win a gift basket full of tasty treats from Silly Goose Farm! Just leave a way to contact you, as well (like your email address). Already voted? That's okay. Get your friends to vote and leave me a note in the comments telling me you voted. A winner will be announced on Friday!

Thanks again for your help! PS - While you are on Facebook, stop over and "like" Silly Goose Farm, too!

Thanks everyone for your support. I was the runner-up in the competition (but I still netted some great prizes and amazing exposure). As a thank you, all three commenters (Tara, Christine, and Becky) will be receiving a special gift from Silly Goose Farm -- thanks for your sweet notes, ladies!