Wednesday, June 29, 2011

Freezing Strawberries

As marvelous and rewarding as berry picking is, it always brings a bit of melancholy. Fresh berries only last for so long, and once they are gone, they are gone. We wait an entire year to eat freshly harvested berries again.


Don't despair. If you haven't perserved a bit of summer by making jam, you can always freeze fresh berries to enjoy year-round. It's a simple process, but you'll need to make sure you have plenty of space in your freezer (so get ready to compost the box of waffles and frozen dinners that hit their expiration dates a year ago.

********************
Freezing Strawberries

1. Wash berries and remove hulls. Cut in half, or if preferred, leave whole.


2. Place berries in a single layer on a cookie sheet (or any sort of flat surface like a tray or baking dish - just be sure that it is safe for the freezer).


3. Place berries in freezer and allow to freeze for at least three hours or overnight. Once berries are frozen, remove from cookie sheet and place in freezer bags or containers. Berries will last in freezer for at least a year (provided you don't eat them before then!). This method works for any type of berry (I heard from an acquaintance that if you freeze blueberries or elderberries, then vacuum-seal them, they have the taste and texture of fresh berries!).

Monday, June 27, 2011

Strawberry-Basil Popsicles

The strawberry marathon continues! This time around it is Strawberry-Basil Popsicles, a super-easy treat that is just perfect for the heat and humidity coming our way in the Northeast.


Growing up, I spent a lot of time at my Aunt Laura's house. Her kids were about my age (my cousin Logan is just a month older than me), and since my aunt worked as a secretary for the school, she had summer's off. My first introduction to homemade popsicles came from those summers, when Aunt Laura would take Kool-Aid or whatever other fruity drink was around and pour it into an ice cube tray. She would place plastic wrap over the top, then stick toothpicks into each cube segment and freeze the whole thing to make little mini popsicles. The weight of the popsicle was often too much for a flimsy little toothpick, but it was no matter to us, we were happy to have a chilly treat for those hazy Upstate New York summers. Making these popsicles reminded me of Aunt Laura and, like any good food should, evoked memories of other times.


********************
Strawberry-Basil Popsicles
Makes 6-8

1/3 cup sugar
1/3 cup water
10-12 basil leaves, roughly chopped or torn
4 cups strawberries

1. Combine the sugar, water, and basil in a small saucepan. Cook over medium-high heat until sugar dissolves and mixture begins to boil.

2. Remove sugar mixture from heat and allow to cool. Be sure to muddle the basil leaves with a wooden spoon to release oils. This is essentially a basil simple syrup recipe. Use more or less basil to taste. Remove basil leaves after about 10 minutes.

3. In a blender, puree strawberries. Add basil simple syrup and blend again. For a smoother consistency, strain mixture through a fine sieve to remove seeds. Pour mixture into popsicle mold or into biodegradable disposable cups. Place popsicle stick or spoon into the center of each popsicle and freeze for three hours or overnight.

4. To unmold popsicles, simply run the mold or cups under hot water for a few seconds. Best enjoyed barefoot and/or in a hammock.

PS - In case you couldn't tell, this recipe is baby-approved.

Thursday, June 23, 2011

Container Herb Garden


Just because I live on a farm does not mean I can't appreciate a nice container garden! We have an old whiskey barrel that sits atop a tree stump just off the kitchen porch - the perfect place for an easy access herb garden. I also refer to this as "Edie's garden," as I have found that if she helps out with the garden, she's more likely to eat what comes from it.


Container gardening is a great sustainable solution for those with limited space (or those with a lot of space who just want easy access). While you can use any combination of containers that works for you, I like to have one big container for all my herbs (you would be surprised how many herb plants can fit!). Here are the steps:

1. Choose a container that is large enough to hold all of your herbs (go for something eco-friendly, like a BPA-free recycled plastic composite, terra cotta, or even vintage whiskey barrel (it's food safe!)). You don't want anything too heavy, unless you are going to plant it in place.

2. Create a good drainage system in your container by drilling small holes in the bottom of the pot (some might come with drainage holes) or lining the bottom of the container with one inch of rocks or gravel.

3. Fill the container within two inches from the top with a good, organic potting soil. Boost the soil's performace with an organic vegetable fertilizer (follow manufacturer's instructions for proper soil-to-fertilizer ratios).

4. Lay out your plants until satisfied with the placement. Using your hands, a dibble, or a small garden trowel, dig holes for the plants and place in the soil (be sure to scarify, or loosen and break up, the roots of the plants). Pat some potting soil around the base of the plant to secure it. Taller plants (like dill and rosemary) should be planted in the center or back of the container, with shorter or trailing herbs (like mint or thyme) on the sides or front. Water thoroughly.


I keep the garden marker with the plants to help identify them

That's it! Easy, right?! Be sure your container herb garden gets plenty of sunlight and water it whenever the soil becomes dry (usually everyday to every-other day, depending on the weather). In my whiskey barrel, I planted dill, rosemary, Mexican oregano, sage, common thyme, lemon thyme, pineapple mint, spearmint, peppermint, apple mint, marjoram, and tarragon. In the empty spaces, I planted strawberries. Afterall, this is Edie's garden, and she really likes picking strawberries. I planted basil, parsley, horehound and catnip in the "big" garden, but really enjoy having herbs right off the kitchen for quick additions to recipes.

If you try to create a container herb garden, send me a picture or a link! I would love to see it. This is a great way to make the most of a small space, perk-up cooking, and introduce kids to gardening.

Wednesday, June 22, 2011

Terrible Two's


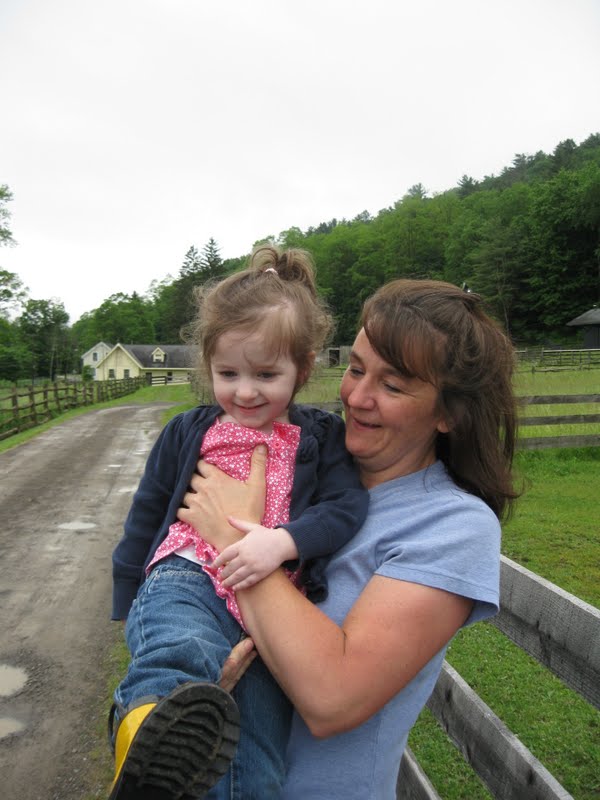
See that sweet, adorable little girl? Don't be fool - she's a Terrible Two's nightmare. I'm having such a hard time with Edith right now. She's definitely pushing the limits (and my patience) to see how far she can go and what she can get away with. It is driving me ca-razy! Besides regular two-year-old antics, I think she is too smart for her own good. I know all parents say "Oh, my kid is so smart!" But Edie always seems to find a way to outwit me.


One rule in our house is no television before breakfast. I am working really hard to enforce sit-down breakfasts every morning at the dining room table. Edie would rather munch on dry cereal in the living room while watching "Curious George." She kept asking me to turn the TV on the other morning, and I told her no, not until after breakfast. The damn kid figured it out herself when I wasn't looking, and threw a complete temper-tantrum when I turned the TV off and made her sit and eat her breakfast. Or how about the time she learned how to make Chocolate Milk herself (thanks Grammie and Papa)? I've got plenty of stories like this - if you are ever completely bored, email me and I'll make you chuckle with her antics.


Edie was sleeping in a crib (with the mattress all the way down basically to the floor) until recently, when she fell while climbing out and smacked her face right on the hardwood floor. I have never seen a bigger goose-egg or a blacker, more swollen eye (it was completely shut at one point! Thankfully nothing was broken). Now she's in a toddler/day bed, and it's been a nightmare! She won't nap or sleep, and instead pulls all the books off the shelf, rips the curtain rods out of the wall (yes, this happened), "zings" her brother while he is sleeping in the same room, and spreads baby powder/lotion/diaper cream over every possible surface. Fun! Needless to say, what was once a beautifully decorated nursery is now an empty cell with a toddler bed, crib and dresser (with drawers tied closed!).


Mealtimes, bathtimes, and working on potty training typically results in her punching, hitting, kicking and screaming (with subsequent time-outs). Sometimes I think, "It's okay. She's two and this is what two-year-olds do. She's just testing her boundaries." Sometimes I think, "She's bored with me. The babysitters always say she's been outstanding and so nice and polite. Maybe she needs more time at the sitters or to go to Pre-school." Sometimes I think (usually while I lock myself in the bathroom and cry a little), "This kid is the Spawn of Chuckie, and it's getting worse because now Eric is picking up on the behavior, too!" Here are some things I've tried and some "rules" I've established:

1. All meals have to be eaten at the table. No snacking between meals (she's getting better about eating)
2. Don't yell at her - it just shows that yelling is okay. When she is bad, give her a warning, then put her in time-out.
3. When time out is over, tell her why she was "punished" and receit the rules with her (no kicking, no hitting, no pushing, no yelling, be nice!).
4. When she is naughty or acting out, don't engage her or react (she is only looking for attention - see rule 2). Give her lots of positive reinforcement and love when she behaves.
5. Spanking is right out. See rule 2.
6. Try to spend more one-on-one time with her, both in the house and away from the house (I'm thinking of taking her to see the new Cars 2 - sometimes, she can be incredibly good, if it's something she wants to do).
7. Try to find a pre-school that will take her once or twice a week (this has been tough, she is already at the sitter's house Tuesday and Thursday).


Anyone else out there going through this? Have you already gone through this? Any tips, hints, or suggestions for me? Don't get me wrong, Edie can be a absolutely perfect child sometimes (saying, "Please," "Thank You," "No, Thank You," and giving lots of hugs, kisses and smiles. I'm just really struggling with her right now (it makes me feel like an absolute shit mom) and I would LOVE your advice! You all seem to be such smarties. Even if you don't have kids, but know something, I'm happy to hear it!

Thanks lovies, you are the best-ests ever!

Monday, June 20, 2011

Strawberry Salad

Salad greens from my mother's garden; berries picked by me

Two words indicative of summer are strawberry and salad. Put them together, and experience a flavor profile that is reminiscent of running barefoot through sprinklers, making s'mores, getting sun freckles on one's shoulders, and backyard camping in rickety tents. This Strawberry Salad is a quick, easy meal that can be whipped up for a tasty lunch or healthy dinner. Enjoy!

********************

Strawberry Salad with Candied Walnuts
Serves Two

5 cups (for me, about 4 big handfuls) salad greens, washed and dried
1/2 cup red onion, sliced
1/3 cup feta cheese, crumbled*
1/2 cup sliced strawberries
1/2 cup walnuts, shelled and halved
1 egg white
1 tablespoon sugar
1 teaspoon cinnamon
1/2 teaspoon cloves
1/2 teaspoon paprika
1 1/2 tablespoons extra virgin olive oil
1 tablespoon balsamic vinegar
Salt and pepper, to taste

1. Preheat the oven broiler (or set oven to 500 degrees Fahrenheit). Combine egg white, sugar, cinnamon, cloves and paprika. Add nuts and mix with fork. Place nuts on a foil-lined cookie sheet and bake for 10 minutes or until golden.

2. Meanwhile, combine the salad greens, red onion, cheese and strawberries. Once walnuts are done, sprinkle on top of salad. Drizzle with balsamic vinegar and olive oil. Season as desired with salt and pepper.  Serve immediately.

*Bleu cheese would also be delicious!

Strawberry Jam

While May is National Strawberry Month, the juicy, red fruits don't hit their prime in the Northeast until June. Strawberries were at peak ripeness last week, so Edith and I went picking.


One of the best ways to ensure you capture a bit of summer is to make Strawberry Jam. The house smelled heavenly all weekend long with the aroma of jam stewing on the stove (something I look forward to all year long). Many people think jam is an overly-complex process. Truth is, you can't really screw it up. If it turns out too thin and runny, it becomes ice cream topping. If too thick, spread it into a parchment-lined 9"x13" pan, cut into 1-inch squares, sprinkle with sugar, and you have jelly candies. Jam does take a little time, and needs to be stirred often to prevent burning (but I just try to catch-up on emails or get through the stack of magazines in the kitchen while the jam is cooking). Here is a simple, all-natural jam recipe I hope you will try.

********************

Strawberry Jam
Makes About 5 Pints*

8 cups strawberries, washed, hulled and quartered
5 cups white sugar
1 1/2 cups peeled, cored and grated apples (like Granny Smith - about 3 apples)**
2 tablespoons Grand Marnier (or any kind of quality orange liqueur or Triple Sec)***
2 teaspoons Kosher salt

1. In a large pot, combine all ingredients. Cook over medium-high heat until a boil forms. Stir frequently with a wooden spoon.

2. Reduce heat to medium. Cook, stirring and scraping the bottom of the pan frequently, until bubbles become larger and slower (about 45 minutes to an hour). Jam should reduce to a little more than half to be considered done, or read at 220 degrees Fahrenheit on a candy thermometer.

3. Remove from heat and immediately ladle into hot jars or other containers. The jam can be canned (either in a hot-water bath or pressure canner, just follow manufacturer's recommendations) or refrigerated for about two weeks.

*This recipe can easily by halved to 4 cups strawberries, 2 1/2 cups sugar, 3/4 cup apples, 1 tablespoon Grand Marnier, and 1 teaspoon salt.

**This recipe uses no commercial pectin. Apples are a natural source of pectin and help to thicken the jam.

***Orange or lemon juice is a fine alternative.

Stay tuned for more strawberry recipes (and be warned... June is National Dairy Month, so look out for recipes utilizing my favorite food group!).


Friday, June 17, 2011

Weekend Listening


Woot Woot! It's Friday! Another week in the books. Got any plans for the weekend? I took most of today off, and made biscuits for breakfast. Edie and I picked about 15 pounds of strawberries this morning, and the rest of the day has been spent working on expanding my veggie and cutting garden. We had planned on having a bonfire to burn some remnant wood from the old barn we removed, but I think those plans have gone amok. Instead, Dave and I are going to hang out in the yard tonight and watch fireworks, I'll be doing more gardening tomorrow and making strawberry jam, and Sunday we'll have a nice family day to celebrate Father's Day.

So, a busy weekend, no doubt. I'll need some music I can jam-out to and keep me motivated. I think Passion Pit fits the bill, especially the songs "Little Secrets" and "To Kingdom Come." Both are on the album Manners, which is also a great driving album for those long summer road trips. Do you have any suggestions for other bands that help maintain productivity?

I hope you have a great weekend, hug your dads, and see you on the flip side!

Lemon Chicken and Mediterranean Couscous

I think I've found the perfect go-to dish. Good hot or cold, simple to make, and impressive enough for company. May I introduce you to Lemon Chicken with Mediterranean Couscous?


********************
Lemon Chicken with Mediterranean Couscous
Adapted from Epicurious.com
Serves 4

For the Chicken:
8 chicken drumsticks (about 2 lbs)
3 tablespoons extra-virgin olive oil
1 1/2 tablespoons of fresh thyme (about 5 sprigs)
2 garlic cloves, smashed
3/4 teaspoon salt
1/2 teaspoon black pepper
8 slices of lemon (1/8-1/4 inch thick)

For the Couscous:
2 cups low-sodium chicken broth
2 tablespoons extra-virgin olive oil
1 tablespoon ground ginger
2 garlic cloves, chopped and smashed
2 teaspoons salt, divided
1 teaspoon ground tumeric
1/2 teaspoon cinnamon
1/4 teaspoon ground cumin
10 ounces plain couscous
3/4 cup raisins
1 large red bell pepper, seeds and ribs removed, diced
1 large carrot, peeled and diced
2 teaspoons lemon zest
1/4 cup fresh lemon juice

1. Place oven rack in upper third of oven, preheat ot 500 degrees Fahrenheit OR heat grill to high heat.

2. Toss chicken with oil, thyme, garlic, salt, and pepper in a large bowl, then transfer to a shallow baking pan OR place on grill.

3. Bake/grill chicken for 10 minutes (if grilling, be sure to turn for even cooking and grill marks), then top each chicken with a slice of lemon. Continue to bake chicken until is it golden and cooked thoroughly (about 15 more minutes, slightly less for grill).

4. In the meantime, bring chicken broth, 1 tablespoon oil, ginger, garlic, 1 teaspoon of salt, cinnamon, and cumin to a boil. Stir in couscous and remove from heat. Scatter raisins over the couscous, cover and let stand for about 10 minutes. Fluff couscous with a fork, then add red bell pepper, carrot and lemon zest. Whish remaining oil, salt, and lemon juice in a small bowl. Add to couscous and toss to coat. Season to taste. Can be made up to one day ahead, just cover, chill, and bring to room temperature before serving.

Original recipes from Epicurious can be found here and here.

Sunday, June 12, 2011

Pimm's No. 1

02_28_11_pimms6.jpg

Just a fun take on the Pimm's packaging. Next time I indulge in a Pimm's Cup, I'll post the recipe (ps - I use a healthy dose of Gin).

Found via The Dieline.

Nigel Cabourn

When it comes to fashion, I don't necessarily follow trends. I know what I like and I tend to stick to it. I would rather invest in a timeless piece I know I will have for a long, long time than buy trendy pieces that change with the seasons. It's a more sustainable way to live, I believe. A lot of the time, I get lucky and find great quality, vintage pieces from Etsy or at local thrift stores. A couple of times a year, though, I'll splurge and indulge in a well-made item I know I'll have for years to come.

Right now, I'm jonesing for a few items from Nigel Cabourn. He is definitely a kindred spirit, as we have similar approaches to fashion and clothing. My wardrobe needs to serve double-duty, allowing me to go from field to boardroom relatively fluidly, while still alluding to creativity. While Nigel Cabourn is a line of mens' apparel, here a few pieces from the collection I'm currently coveting:

Naval Satchel - perfect for hauling laptop and client files
around while looking okay with a little dirt on it

Jungle Rat Sweater - I'd pair it with skinny jeans, killer heels (preferably
peep-toes with red toenails), a chunky necklace and slicked-back ponytail.

The bonus here is that the line is pretty tough to find in the States, so you can nearly guarantee that no one will be sporting the same pieces as you! Selectism has a bunch of great posts on Nigel Cabourn, check them out!

Think about what you wear when you try to pursue a sustainable life. Sure, I buy pieces from Target, the Gap, Old Navy, etc., but I try to balance them with well-made, eco-friendly and socially responsible items. Your wardrobe is an great way to lead a stylish, sustainable lifestyle!

Saturday, June 11, 2011

The Farmers' Museum

Edith, Eric and I just came back from the Farmers' Museum in Cooperstown, NY. I had been to the museum twice before as a kid, but this time might have been my favorite (based on how much the kids liked it). We met up with my mom, and had planned on having lunch afterwards, but the kids were a little too tired for that.

Right away, we took a ride on the Carousel. This is the first time Edie has been on a Carousel without screaming. Eric seemed to enjoy it, too!


Then we went to visit some of the animals. A pair of young oxen (named Bix and Bright) were first on the list.


The Farmers' Museum is a replica of a 19th century historic village. We poked our heads into some of the buildings


Chickens roamed about as they pleased (I think these were a Plymouth Rock breed these cluckers are Barred Rock chickens).


Hops! I really want to grow some next year.


Newly-dyed yarn was left to dry.


We all had fun watching the sheep. Edie and Eric laughed at the lambs crawling into the hay trough.


Edie can waddle...


... And has yellow feet...


... Just like a duck.


We watched a draft horse get hitched to a wagon, then took a ride!


The Apothecary had an herb/medicinal garden. I'm so jealous!


On our way out, Edie insisted on showing Eric how to drive the baby oxen...


... But he wasn't very impressed.

"You've got to be kidding me."

I picked up a lot of great ideas from the Farmers' Museum to use here on our fledgling farm. My mom's family actually employed a lot of similar farming methods growing up (she and her siblings would hook-up a pair of work ponies to a wagon and ride into town to buy provisions from the General Store and hang with their friends!), and it was fun to hear her teach my kids about some of the things at the Museum. I highly recommend a visit if you ever have the chance!

Friday, June 10, 2011

Sustainable Snippets


Happy Friday! Another week gone, another weekend arrived. I can't believe we are in mid-June already, as my mind is still in April-mode. Any fun plans for the weekend? I have a slew of client work to catch up on due to our long weekend in Boston (I finished a HUGE report for a client last night and it feels so good  to have it off the docket), but I'm hoping I can get dirty in the garden this weekend and plant several new tomato plants. Dave is away at a writing conference on Saturday, so the kids and I might head out to Cooperstown, NY to meet my parents at the Farmers Museum, as well. Have a great weekend, and enjoy these Sustainable Snippets.


Considering how much I love this stuff, I feel like I should be more relaxed

Maybe this will help me kick the M&M addiction


Looks like my college habit of "slapping the bag" is now en vogue


Think twice before putting these items in your recycling bin

Wednesday, June 8, 2011

Announcements and Updates

A little bit of housekeeping to take care of.

To begin, the last week in May marked my first "blog" anniversary! I had been blogging for clients and other sources for years, and last year I finally bit the bullet and created my own blog. Here are links to some of my favorite blog posts from the past year:

Welcome to Silly Goose Farm!

Blueberry Buckle

Barnside Movie

Rockport: Part One

My Dream Vehicle

I hope you will check them out! My parents came to our house for the Memorial Day Weekend, and because my father owns every single tool on the face of the planet, we did a lot of work around the farm. Besides getting my veggie garden in (finally - more on that later), we also chopped down a bunch of trees and brush and took the rest of an old barn down (it had collapsed from heavy winter snows). Here are some before/after shots:

Front of the House Before (don't be fooled - this photo was taken May 2008, and the shrubs in the front of the house had grown up to the second story windows):


Front of the House After


Backyard Before (the humongous Arborvitae in the right of the picture was overwhelming the Eastern Red Bud, as were two huge yews behind it):


Backyard After (It makes the yard look HUGE!):


Old Outbuilding Before (you can barely see it - all that snow made it collapse):


Old Outbuilding After  (We are planning on a big bonfire to burn the rest of this down, and it will be the future home of a lovely pergola):


So much work to do on the farm, but I'll update you on other projects later. Prior to all of this work, my dear friend Kelly stopped by the farm to chit-chat, take pictures and eat some yummy coffee cake. Kelly moved down to Brooklyn the following weekend, and I miss her so much (though I know the move was absolutely the right thing for her to do). Thankfully she's only a 2.5 hour train ride away! I hope you'll check out some of Kelly's amazing shots!

So, this summer is already shaping up to be a busy one. Between all the traveling we've done, and all the upcoming projects and parties we are planning, I have a feeling Summer 2011 is going to fly right by!