Showing posts sorted by date for query Cheese. Sort by relevance Show all posts

Wednesday, April 10, 2013

Soft, Chewy Pretzels


I like having staple recipes that I can turn to over and over again to fit a variety of eating needs. Soft, chewy pretzels are one of those staples. Quick lunch option for kids? Check. Late night movie snack? Check. Friends coming over for board games? Check.

Make a batch of these pretzels ahead of time, they freeze well, like biscuits (just let them cool completely, then stick in a zip-top bag). Reheat in a brown paper bag at 350 degrees Fahrenheit for about 10 minutes and serve with tangy mustard or cheese sauce.


********************
Soft, Chewy Pretzels
Makes 8 large pretzels or 16 smaller pretzels

1 1/2 cups warm water
2 tablespoons light brown sugar
1 package active dry yeast (2 1/4 teaspoons)
3 ounces unsalted butter, melted
2 1/2 teaspoons sea salt
4 1/2 to 5 cups all purpose flour
Vegetable oil, to coat bowl
3 quarts water
2/3 cups baking soda
1 egg (mixed with 1 tablespoon of water to make an egg wash)
Course sea salt

1. Combine 1 1/2 cups water, sugar, yeast, and butter in a bowl and mix until combined (if using a stand mixer, use a dough hook). Let sit for five minutes.

2. Add the salt and flour to the mixture and mix until combined. Continue to mix/knead in the bowl until the dough pulls away from the sides of the bowl. If the dough appears to wet, add additional flour, one tablespoon at a time. Remove the dough from the bowl, place on a flat surface and knead into a ball with your hands.

3. Coat a large bowl with vegetable oil; add the dough and turn to coat. Cover with a clean towel or plastic wrap and place in a warm spot until the dough has doubled in size (about one hour).

4. Preheat the oven to 425 degrees Fahrenheit. Bring the 3 quarts of water to a boil in a large pot.

5. Remove the dough from the bowl and place on a flat surface. Divide the dough into eight equal pieces. Roll each piece into a long rope. To shape into pretzels, take the right side and cross over to the left. Cross right to left again and flip up.

6. Slowly add the baking soda to the boiling water. Boil the pretzels in the water solution, two at a time for 30 seconds, splashing the tops with the water with a spoon. Remove with a large, flat slotted spatula or a spider. Place pretzels on a baking sheet, leaving plenty of space between each pretzel, and brush the tops with the egg wash and season liberally with sea salt. Bake for 15 to 18 minutes or until pretzels are golden brown. Remove pretzels from baking sheet and allow to cool on a wire rack.

Tuesday, January 1, 2013

A New Year

Pinned Image


"You don't know anyone at the party, so you don't want to go. You don't like cottage cheese, so you haven't eaten it in years. This is your choice, of course, but don't kid yourself; it's also the flinch.

"Your personality is not set in stone. You may think a morning coffee is the most enjoyable thing in the world, but it's really just a habit. Thirty days without it, and you would be fine. You think you have a soul mate. but in fact you could have had any number of spouses. You would have evolved differently, but been just as happy.

"You can change what you want about yourself at any time. You see yourself as someone who can't write or play an instrument, who gives in to temptation or makes bad decisions, but that's really not you. It's not ingrained. It's not your personality. Your personality is something else, something deeper that just preferences, and these details on the surface, you can change anytime you like.

"If it is useful to do so, you must abandon your identity and start again. Sometimes, it's the only way.

"Set fire to your old self. It's not needed here. It's too busy shopping, gossiping about others, and watching days go by and asking why you haven't gotten as far as you'd like. This old self will die and be forgotten by all but family, and replaced by someone who makes a difference.

"Your new self is not like that. Your new self is the Great Chicago Fire - overwhelming, overpowering, and destroying everything that isn't necessary."

-Julien Smith

Sending you all the best wishes for a joyous, healthy, peaceful, and prosperous 2013!

Tuesday, October 30, 2012

Homemade Halloween Goodies

First off, I'm hoping anyone affected by Hurricane Sandy is doing well. Best wishes for a safe and speedy recovery.

If you are like me, you probably waited until the last minute to get your Halloween goodies together. Fear not - there is still time to make some treats from scratch!


If you don't have the time to make your own, I'm going to let you in on a new favorite secret of mine: G.H. Cretors popcorn! This stuff is bonkers good, and the best part is that it's Gluten-Free, GMO-Free, Kosher, and made with all-natural ingredients. 
G.H. Cretors - Chicago Mix

The Chicago Mix is definitely my favorite - it's a mix of cheese and caramel corn. I love the Caramel Nut Crunch, too.
G.H. Cretors - Carmel Nut Crunch

5_Bag_Sampler_Landing

Get a sample pack and try them all out! So good. You can buy on the site, on Amazon or use the store locator for more information. This would be an awesome holiday present (hint hint). Keep tabs on G.H. Cretors on Facebook.

Good luck prepping for Halloween! Are you handing out candy or going the extra mile to make something special? How many trick-or-treaters do you get? (We get two.)

Thursday, September 13, 2012

Corn Cob Jelly

Please excuse the wild children and Cozy Coupe in the background.

File this under "Weird Things To Can" (perhaps along with Tomato Jam). Corn cob jelly sounds so, well, weird, right? How could that possibly taste good?

It does, I promise. In fact, it tastes remarkably like wildflower honey. I've heard others make that claim, but I didn't believe it until I tried it for myself. But kind of like Queen Anne's Lace Jelly, this isn't something I would necessarily want to add to my PB&J's. So after I made it I had to figure out how to use it. Turns out it tastes great on a cheese board, on fried green tomatoes, on hush puppies, and even on top of more corn (in the form of fritters). I'm sure it would be delicious on any other kind of pan-fried offering. I might even get brave and try it in place of honey in different sauce and dressing recipes. If you try to make it, let me know and tell me how you used it!

Oh, and my pal Jillian has a great how-to for freezing corn, in case you were interested (save those cobs, Jillian!).

********************
Corn Cob Jelly
Makes 3 1/2 cups, or 3 1/2 half-pints

12 sweet corn cobs
4 1/2 cups water
3 1/2 cups sugar
1 packet liquid pectin

1. In a large pot, combine water and corn cobs. Cut the corn cobs in half (carefully!) if necessary. Cover and boil for 30 minutes. Allow to cool slightly.

2. Using cheesecloth and/or a fine mesh strainer, pour out the liquid and reserve it. Discard corn cobs (carve yourself a pipe, leave for squirrels and other critters, or simply compost). Rinse out the pot and add the "corn stock" back to it.

3. Place the pot over medium-high heat and add sugar. Bring to a boil and add pectin. Reduce heat to medium and continue to cook until the jelly is at preferred "set" stage (when it sheets off your wooden stirring spoon or congeals as soon as it hits a plate pulled from the freezer).

4. Carefully pour the hot jelly into desired vessel(s) (freezer jars, canning jars, or a dish for the refrigerator). Wipe rim(s) and cover. If you want shelf-stable jelly, process in a hot water-bath canner for time appropriate to your jars (5 minutes for quarter-pints, 7-10 minutes for half-pints, 15-20 minutes for pints). Jelly will last for 3-6 months in the fridge and up to a year in the freezer or pantry (if processed properly). Enjoy!

*Optional step: If you want your jelly to be more yellow, add a few drops of yellow food color to the corn stock before adding sugar and pectin.

Friday, August 24, 2012

Where I Get My Groceries


Today, I’m doing a multi-post series chronicling how I actually eat (everything from what I typical feed my family during the day to how I maintain a garden). You can read more on From Scratch Club and Eat Local.

I thought I would talk about the places that I shop and source from. Even though I live in a small town (population: 377), I have a bevy of options when it comes to groceries.


In the warmer months (and with stuff that can be over-wintered), I love “shopping” in my backyard. Having sustenance from one’s own efforts is a luxury I wish more people had. I’m talking about my garden over on the Eat Local blog.


I get a lot of produce and cheeses from Mildred’s, which is run by Jessica. It’s right in town and I try to go over once a week. Some of the items I buy at Mildred’s include cheese, berries, tomatoes, onion, potatoes, seeds and plants. I even get my Christmas tree, topsoil, and mulch here. Jessica is great and I know I can shoot her a message on Facebook anytime and she’ll do her best to accommodate my requests.

Echo Pond Farm
My neighbors own Echo Pond Farm and run a small farm stand at the end of their driveway. I get delicious sweet corn, peppers, squash, grapes, and pumpkins. I have great neighbors who are always happy to help me with gardening advice, and even gave the kids a giant pumpkin last year for Halloween (same neighbor with the great homebrewing advice!). It’s great to see much of what I eat grown just up the road, too.


I get my spices and many baking supplies here (and sometimes junky stuff like candy and chips and such). Rice, pasta, local honey are also available. They now offer freshly milled local flour – score!


I run here to get milk and ice cream as needed, and that’s about it (and my favorite flavor of ice cream, Dark Chocolate, just won the top prize at the 2012 World Dairy Expo!)


I get deli items and meats here, especially sustainably-raised beef from just up the road. Local sausages are available, as is the most delicious hamburger, named after our town.


I don’t buy much pre-packaged food, but I do still buy “essentials” (vinegars, oil, salt, baking products, hummus, milk, any prescriptions (when needed)) from my local grocery store (Hannaford). They also have racecar shopping carts, which make the kids super-happy.

Other Items
Since I also do a lot of home preservation (aka: Canning and “putting up”), I can typically turn to my pantry to find lots of jams, jellies, sauces, relishes, and other items to build meals from.

If I’m in that neck of the woods, I’ll stop into the Fresh Market or Honest Weight Food Co-Op for gourmet or specialty items. I try to hit up the farmers market when I can, but because I can get most of what I need locally or from my own backyard, I don’t need to visit as often as others might. Sometimes I'll hit-up the little liquor store in town or grab take-out from the small restaurants in town.

Where do you grocery shop? Are you a “one-stop-shopper” or do you go to several smaller markets? Share your “shopping strategy” in the comments, if you’d like!

Wednesday, June 27, 2012

Host Your Own Cheese Night


The Night of Cheese wrap-up is complete! In case you missed a course, here is the rundown:


Maybe you are completely tired of cheese at this point (shame on you!), or maybe this series has inspired you to throw your own cheese tasting. If you are looking for any easy place to start, you can refer to the ideas and tips in the posts above, or you can check out this post I wrote for From Scratch Club about De-Mystifying the Cheese Plate. Learn about how many cheeses you should put on a cheese plate (three or five), what type of milk to choose, mixing textures, appropriate serving sizes, how to arrange the plate, adding accouterments, and much more! If you have any more questions about cheese (how to use it, how to buy it, what to do with it), email me or leave me a comment!

Tuesday, June 26, 2012

A Night of Cheese - Sixth Course


The final course for the Night of Cheese was the simplest course to assemble. A play on a classic dessert offering, Seaver Brook Blue (from Bonnieview Farm, South Albany VT) was plated next to a dollop of buckwheat honey. Traditionally, chestnut honey would accompany this style of cheese, but chestnut honey can be tough to come by here in the States. Buckwheat honey is a comparable alternative and is just as tasty.  It's gentle earthiness and rich flavor help to balance the pungency of the blue cheese. The sweetness of the honey compliments the sweetness in the cheese.

The Churchill's 10 Year Tawny Port was paired alongside the Seaver Brook Blue. The port's rich and complex taste is typical of a tawny port, but it's unique brightness balanced the other heavy textures of the cheese and honey.

No recipe here. It was all about simple, delicious ingredients and easy assembly.

A very special thank you to Eric Paul, The Cheese Traveler, for his expertise. Without him, this night would not have happened! Be sure to follow him on Facebook. Bonnieview Farm cheese can be purchased through The Cheese Traveler, online, or at regional farmers markets.

Tuesday, June 12, 2012

A Night of Cheese - Fifth Course


The fifth Night of Cheese course was a slam-dunk favorite. Everyone loved it! And how could one not? Cheese, chocolate, and delicious booze all in one course? Sign me up.

This course consisted of Rupert from Consider Bardwell Farm (West Pawlett, VT), Cornelius Applejack from Harvest Spirits (Valatie, NY), and homemade chocolate Chantilly cream (which might be the easiest chocolate dessert ever, besides eating a straight-up chocolate bar). The cheese has subtle notes of butterscotch and custard. It is aged a minimum of six months and has a thin rind, indicative of even turning and rotating of the wheels of cheese on a frequent, regular basis. It certainly has a sweetness with the characteristics of an Alpine-style cheese.

Applejack and chocolate Chantilly were natural choices to feature with the Rupert. Both have a similar depth and roundness of flavor, but were perhaps surprising at the same time: Chocolate is typically paired with a blue cheese at dessert, and hard alcohol with cheese is not a common accompaniment. Altogether, though, it was a fantastic combination. One warning about the chocolate Chantilly: It's addictive. You'll be making it often and eating it all. By yourself. Just be sure to use a very good quality chocolate since it's really the only ingredient in this recipe.

********************
Chocolate Chantilly
Adapted from this recipe via Cafe Fernando
Makes approximately two cups

9 ounces bittersweet or semi-sweet chocolate, chopped
1 cup water
4 tablespoons sugar, optional

1. In a double boiler (or, just a small pot with 1 inch of water with a larger bowl on top of it), heat together the water, sugar and chocolate. Whisk together until melted.

2. Place bowl with chocolate mixture in a second larger bowl filled 1/3 to 1/2-way full of ice water. With a whisk or electric mixer, whip the chocolate mixture until it thickens (about five minutes). Do not over whip or it will become grainy. Serve immediately, or let set up (covered) in the refrigerator - it's great straight-up or as a filling to cakes and cookie sandwiches.

A very special thank you to Eric Paul, The Cheese Traveler, for his expertise. Without him, this night would not have happened! Be sure to follow him on Facebook. Consider Bardwell cheese can be purchased through The Cheese Traveler or online.

Monday, June 11, 2012

A Night of Cheese - Fourth Course


Sorry for the bad picture here... I had to snap it just before someone ate it! I always forget to take pictures :)

The fourth course for the Night of Cheese was probably the most savory of the offerings, even though it was still on the sweet side. Featured was the Battenkill Brebis cheese from 3-Corner Field Farm (Shushan, NY), paired with a 2008 Syrah from the Magnificent Wine Company (Columbia Valley, Washington) and fresh pears with balsamic-steeped cherries.

I can't lie - this course took a little fanagaling to get it just right. The cheese is a superstar and most definitely deserved a spot on the menu, but getting the right combination of accompaniments and accouterments was somewhat challenging (for me, certainly, more than Eric). Battenkill Brebis is an aged raw sheep milk cheese that has a firm texture (like Parmesan, but smooth like an aged cheddar). It is nutty and has a particularly gritty texture towards the rind. The richness of the cheese called for a bold yet smooth wine.

Enter the Syrah. It was peppery with notes of cherry. Slightly oakey, it coated the entire palate highlighted the earthy qualities of the cheese. We took a cue from these existing flavor profiles and steeped some dried cherries in balsamic vinegar and coupled that next to pears from the Silly Goose Farm orchard that were cellared over the winter (the cherries highlighted the flavors of the wine and cheese, while the pear helped cut the richness of it all and brightened the plate). Keep some of these cherries on hand to add as a quick topping to lots of different cheeses or pureed up and added to salad dressing.

********************
Balsamic-Steeped Cherries
Makes approximately 3/4 cup of cherries and balsamic syrup

1/2 cup dried cherries
1/3 cup good balsamic vinegar (I used a little bit of fig balsamic, as well)
1 tablespoon honey

1. In a small saucepan over medium-high heat, whisk together the balsamic vinegar and honey. Once it just boils, reduce heat to medium/medium-low and add cherries

2. Cook for about five minutes (until cherries appear to soften slightly). Remove from heat at allow to steep for 10 minutes

3. Serve immediately or allow to sit in a covered container in the refrigerator for up to a month

A very special thank you to Eric Paul, The Cheese Traveler, for his expertise. Without him, this night would not have happened! Be sure to follow him on Facebook. 3-Corner Field Farm cheese can be purchased through The Cheese Traveler or online.


Thursday, June 7, 2012

A Night of Cheese - Third Course


Sorry for the blogging break... let's get back to it!

The third course for the cheese workshop (I thought) was especially tasty, but I'm not sure what guests thought of it. Some seemed to really enjoy it. Others... not so much. The cheese was called Manchester from Consider Bardwell Farm (West Pawlett, Vermont). A raw goats milk tomme, the cheese has a particularly nutty flavor which is more concentrated as you eat towards the rind (if you like, you can also eat the rind, or save it for soups and stews).

The Manchester was paired with Ommegang Witte, a beer from my favorite brewery in Cooperstown, NY. The effervescence in beer is a great companion with cheese, as it helps to cut the creaminess on the mouth's palate and bring out the flavors in the cheese. The Witte is a Belgian-style white beer, and it's smooth yet spicy flavor was very complementary to the nuttiness of the cheese.

Homemade walnut praline was also served with the cheese and beer - the sweetness played off the spiciness of the beer, while the walnut brought out the nutty notes in the cheese.

I made a decent sized batch of walnut praline, and any left over was mixed into maple ice cream for a tasty treat a few days later. This praline is very easy to make and only takes about 15 minutes to cook, but let it cool and set-up overnight. If you want a thinner praline, chop the walnuts a bit finer, but for this use I left the nuts "chunky," as I wanted to highlight the nut aspect more than the sugary aspect of the praline.

********************
Walnut Praline
Recipe adapted from Food.com

1 cup brown sugar
1 cup white sugar
1 cup walnuts
1/2 cup evaporated milk
2 tablespoons butter
1 teaspoon vanilla extract
1 teaspoon cinnamon
1 teaspoon honey

1. Spray a rimmed cookie sheet or half-sheet pan with cooking spray. Place sheet/pan on trivets or kitchen towels to protect the counter from heat

2. Combine sugars and milk in a saucepan over medium heat. Stir with a wood spoon. Be careful not to scorch the milk

3. One the mixture begins to boil, stir in the butter, walnuts, spices and honey. Continue to cook, without stirring, until the temperature reaches 235 to 240 degrees Fahrenheit on a candy thermometer. Remove from heat and let cool for five minutes

4. Carefully pour the hot praline mixture onto the cookie sheet and let cool. Once completely cooled, break the candy into desired sized pralines. Enjoy!

A very special thank you to Eric Paul, The Cheese Traveler, for his expertise. Without him, this night would not have happened! Be sure to follow him on Facebook. Consider Bardwell cheese can be purchased through the Cheese Traveler or online.

Wednesday, May 2, 2012

A Night of Cheese - Second Course


The second course for our cheese workshop featured a really fun cheese called Eclipse. Crafted by R&G Cheesemakers in Cohoes, NY, Eclipse is a goat's milk cheese that is soft ripened and features a coating of vegetable ash. A bloomy rind develops over the ash (which is all edible), and the cheese itself is slightly sweet.

The cheese was paired with orange marmalade and toasted pistachios. Both are traditional pairings for cheese: The acidic citrus rind in the marmalade balances the chalky characteristics of the vegetable ash; the pistachio is a nice contrast to the creaminess of the cheese's paste.

The beverage pairing in the second course was a 2010 Domaine Des Vieux Sancerre. A quick note about Sancerre - it's not an actual type of wine or grape, but rather, a region in which the wine is made (in the Loire Valley in France). The grape variety it is produced from is Sauvignon Blanc, and the wine gets its mineral qualities from the soil in which the grapevine is grown (that's why you can have wines produced from the same varietal of grape but with different flavor notes). The style of the cheese is typically of the Loire Valley, so pairing the Eclipse with the Sancerre was a nod to the traditions of wine and cheese.

I made the marmalade for this course. Marmalade is a different beast from some of the other jams or jellies that I've made in the past. It involves a few more steps and can take a few weeks to set; with that said, marmalade is still an easy recipe and is a great to keep in one's repertoire. Note that I kept the traditional peel in the marmalade to a fine zest. I think for the purpose of pairing with cheese, it helped to balance the bitter/sweet ratio of the marmalade as to not overpower the cheese. Feel free to make the peel/zest as fine or thick as you would like!

********************
Orange Marmalade
Makes about three pints
Based on the recipe from the Better Homes and Gardens New Cookbook

5 medium oranges
1/8 teaspoon baking soda
5 cups sugar
1/2 of a 6-ounce package of liquid fruit pectin (or 3 ounces of homemade liquid pectin)

1. Zest the rind of the oranges, being sure to avoid the white pith. Bring the zest, 1 1/2 cups of water and the baking soda to a boil. Simmer, covered for 20 minutes. Do not drain.

2. With a sharp knife, cut the pith off the oranges, then cut out the segments of the oranges, being sure to cut between the segment membranes and avoid seeds. Discard pith, seeds and membranes. Squeeze the segments to extract juice into a bowl, then add the juice and the fruit to the boiled zest mixture. Simmer, covered, for 10 minutes. Measure three cups.

3. In an 8- to 10-quart heavy pot combine the three cups of fruit mixture and the sugar. Bring to a full rolling boil, stirring constantly. Quickly stir in the pectin and return to a full boil. Boil for one minute, stirring constantly. Remove from heat and skim off foam with a metal spoon.

4. Ladle marmalade into hot, sterilized jars, leaving a 1/4-inch headspace. Wipe the jar rims clean and screw-on lids. Place in the fridge (for up to three months) or hot-water bath can for 10 minutes.


A very special thanks to Eric Paul, The Cheese Traveler, for his expertise. Without him, this night would not have happened! Be sure to follow him on Facebook. R&G Cheese can be purchased through The Cheese Traveler.

Monday, April 23, 2012

A Night of Cheese: First Course


The first course in A Night of Cheese featured one of my favorite cheeses - Fresh Goat's Milk Cheese from Coach Farm (Pine Plains, NY). The cheese was smooth and creamy with a little bit of tang on the finish. Its most notable feature was probably the creaminess, which coated the entire palate, but a close second would be the grassy notes that proved how fresh the cheese really was. Each diner received half of a two ounce cheese "button" alongside a candied orchid. The hardened sugar on the orchid provided a nice crunch to contrast with the cheese, while the floral qualities highlighted the "grassiness." Diners simply plucked off the petals to enjoy with each bite of cheese.

The beverage pairing was a Non-Vintage Cuvee M from Mumm Napa (Rutherford, CA). This demi-sec sparkling wine featured particularly small bubbles and a long finish, which were excellent for cleansing the palate and cutting the creamy texture of the cheese. For more info on sparkling wine dryness, read this post.

I really loved this course. It was the perfect jumping off point for the rest of the evening. The candied orchids were an elegant touch that could not have been simpler to make. Try making a batch of candied edible flowers to decorate cakes and other baked goods! (Besides orchids, other edible flowers include herb and fruit blossoms, violets, johnny jump-ups, carnations, lilacs, nasturtiums, English daisies, marigolds, and hollyhocks, among others.)

********************
Candied Flowers

One egg white (or powdered egg whites - mix according to manufacturer's instructions)
Castor sugar or superfine sugar
Edible flowers

1. Select your flowers. Be sure to choose flowers that have been grown for culinary purposes without pesticides and that are blemish free (you want them to look pretty, after all!). Wash them gently or wipe with a wet sponge to remove any dirt. Allow to air dry.

2. Beat an egg white until slightly frothy. With a small clean paintbrush, lightly coat each flower (front and back) with the egg white (work in batches to avoid the egg white drying too fast on the flower).

3. Coat each flower thoroughly with the sugar. To make your own superfine sugar, pulse white granulated sugar in a food processor several times (be careful - don't turn it into powdered sugar!).

4. Allow each flower to dry for 12-24 hours on a baking sheet lined with wax paper. Store in an airtight container until ready to use. Candied flowers will last up to three months in a cool, dry environment. Avoid eating the white base of each flower, which tends to be bitter.

A very special thanks to Eric Paul, The Cheese Traveler, for his expertise. Without him, this night would not have happened! Be sure to follow him on Facebook. Coach Farm goats milk cheese can be purchased through The Cheese Traveler or at any of these establishments.

A Night of Cheese


I recently hosted a truly magical evening at Silly Goose Farm. With the help of my friend Eric Paul (aka The Cheese Traveler), I invited a group of fellow foodies to the farm for an intimate evening of cheese! The "Night of Cheese" was  a six-course cheese tasting (with full beverage pairings and accouterments) that went beyond the normal parameters of a "tasting" and broke into workshop territory. I think the attendees learned more about cheese than they ever thought possible! Eric explained how each cheese was made and the style and history of each offering, plus suggested other potential pairings and the best practices for assembling a cheese plate. Our tasting focused on the sweeter side of cheese and opened minds to the power of cheese for dessert!


I set the table simply - white linens, my collection of Bell Flower china and mismatched silver flatware, new and vintage stemware, and a recent acquisition of antique Anchor Hocking green glass tumblers. Menu cards were wrapped around each napkin, and I made itty-bitty notepads that I fastened to the inside of the menu cards so that guests could write down tidbits of information from the evening. White tulips in old salt and pepper shakers and lots of (unscented) candles finished the table.

The menu of the evening was as follows:

First Course: Fresh Goat's Milk Cheese (Coach Farms, Pine Plains, NY), Cuvee M (Non-Vintage, Mumm Napa, Rutherford, CA), Candied Orchids
Second Course: Eclipse (R&G Cheesemakers, Cohoes, NY), Sancerre (2010, Domaine Des Vieux Pruneirs, France), Orange Marmalade, Toasted Pistachio
Third Course: Manchester (Consider Bardwell Farm, West Pawlett, VT), Ommegang Witte (Brewery Ommegang, Cooperstown, NY), Walnut Praline
Intermezzo: Lemon Sorbet
Fourth Course: Battenkill Brebis (3-Corner Field Farm, Shushan, NY), Syrah (2008, Magnificent Wine Company, Columbia Valley, WA), Fresh Pear with Balsamic-Steeped Cherries
Fifth Course: Rupert (Consider Bardwell Farm, West Pawlett, VT), Cornelius Applejack (Harvest Spirits, Valatie, NY), Chocolate Chantilly
Sixth Course: Seaver Brook Blue (Bonnieview Farm, South Albany, VT), Tawny Port (10 Year, Churchill's Portugal), Buckwheat Honey

The night was really amazing! I had the best time planning and prepping with Eric, and based on the responses of the attendees, everyone had a phenomenal time! To learn more about what The Cheese Traveler is about, what he is up to, and where he is going, please be sure to visit him on Facebook!

I'll be posting about the details of each course (with recipes!) this week, so stay tuned for more cheesy goodness.

Tuesday, November 29, 2011

Biscuits

PS - I made that coffee mug!!

There are certain recipes every kitchen-savvy person should have in their repertoire for last-minute emergencies. Go-to dishes that can pinch hit and are flexible enough for myriad uses and adaptations. For me, biscuits are it. They can find a place in nearly any meal and once a good basis is established, they can be manipulated to fit a whole host of scenarios. My biscuit recipe is adapted from Baking with Julia, a cookbook I'm not sure I could live without. Seriously... go buy it right now. You won't regret it.

These biscuits can be made in advanced and frozen. Just be sure to keep them in a freezer bag and remove as much air as possible to prevent freezer burn. To reheat, place them in a paper bag in a single layer, close the bag by folding up the open end and bake for 10-15 minutes in a 350 degree Fahrenheit oven.

********************
Biscuits
Makes 8 3.5" Biscuits

4 cups all-purpose flour
2 tablespoons baking powder
2 teaspoons salt (preferably Kosher)
2/3 cup vegetable shortening
2 cups milk

1. Preheat oven to 425 degrees Fahrenheit. In a large bowl, combine flour, baking powder and salt. Cut in shortening with two knives or a pastry blade. Stir in milk. Mix until just combined.

2. On a well-floured surface, turn out dough and dust with flour. Pat the dough out with hands until it is 1/2-inch thick. Fold dough in half, then in half again. Pat until the dough is 1/2-inch thick. Do this at least two more times, making sure not to overwork the dough. Folding the dough will help to give it "lift" and layers.

3. Use a 3.5" biscuit cutter to cut-out biscuits. Re-fold scraps and pat the dough out to 1/2-inch thick again (you'll probably end up with a little ball of dough left - pat it down and make it into a mini-biscuit). Brush the tops of the biscuits with an egg wash (one egg mixed with 1 tablespoon of water or milk). Let the biscuits rest for 5 minutes.

4. Place biscuits on a greased cookie sheet (or better yet, on a pizza stone hot from the oven) and bake for 12-15 minutes, or until biscuits have risen and appear golden on top. Place on a cooling rack. Enjoy!


Some more ideas: Serve these biscuits at breakfast with butter and jam or at dinner with herb compound butter (you could even dust the tops with a little herbed salt before baking). These biscuits are a great companion for strawberry shortcake - just sprinkle some sanding or demerara sugar on top of the dough after the egg wash. For a savory kick, try adding 1/2 tablespoon of dill and 1 cup of grated cheddar cheese to the dough, or add 2 teaspoons of Old Bay seasoning and use these biscuits to sop-up melted butter at a seafood bake. Herb fans should try adding sage, a la this guy.

Monday, August 1, 2011

Queen Anne's Lace Jelly


Sometimes when I make a recipe, I can't help but wonder who thought of that? Who decided to try these ingredients, and how many did they try before they found the right one? This notion ran through my mind often while making Queen Anne's Lace Jelly. Seriously, who was the first person to walk through a field, gather an armful of the flower and think hey! I bet that would make a tasty spread. Let's cook it up and see what happens! I think of things like this a lot (blame the history buff inside me - I keep a journal of ideas for history books I intend to write one day, and subjects like culinary history are front runners). Of course I had to turn to Dr. Google for such answers. Here is what I found:

- Queen Anne's Lace is the progenitor of modern carrots. In fact, it is know as "wild carrot" (and if you dig it up and crush the roots, it smells like carrots)

- The flowering period for Queen Anne's Lace (in the Northeast) is typically June through August

- Queen Anne's Lace has medicinal qualities, much like many other herbs and wildflowers. It is thought that the plant can act as a diuretic, sooth the digestive tract, support the liver and aid in waste removal by the kidneys. It also aids in the treatment of dropsy/edema

- The leaves of Queen Anne's Lace (as with modern carrots) contains a high level of porphyrins, a hormone that stimulates the pituitary gland and can increase sex drive (bonus!)

- There is conflicting evidence on the effect Queen Anne's Lace has on fertility (depending on what part of the plant is used). While some claim it can increase fertility, others claim it acts as a contraceptive, and can even cause miscarriage. If you are preggers, I recommend you stay away, as with most other herbs

- Queen Anne's Lace is a dead ringer for Hemlock (yep, like the kind that killed Socrates). Be extremely careful when harvesting the flower to make sure you have the right one. The easiest way to differentiate the flowers is that Queen Anne's Lace has a "hairy" stem, while Hemlock has a smooth stem

- The source of the name is disputed, but many stories point to Royal fashions, the Patron Saint of lacemakers (St. Anne), and several instances related to Queen Anne of England/Denmark

For more information on Queen Anne's Lace and to see pictures, please visit The Carrot Museum

So, back to the jelly - Queen Anne's Lace Jelly isn't what I would refer to as a Peanut Butter and Jelly staple (like Strawberry Jam is), but more an accompaniment to a lovely cheese plate (alongside a nice creamy brie, candied nuts, and buttery crackers). Like other flowers jellies (lavender, rose, etc) it has a very herbaceous, medicinal taste. The only way to know if you like it is to try it, so here's the recipe, have at it!


********************

Queen Anne's Lace Jelly
Makes Approximately 2 Pints

18 fresh, large Queen Anne's Lace flower heads*
4 cups boiling water
1/4 cup lemon juice
4 cups sugar
2 packages powdered pectin
3 drops natural red food coloring, if desired

1. Fill the sink or a large bowl with cold water. Submerge flower heads in the water and slosh around to remove any insects. Drain flowers.

2. Place the flowers in a large pot** and cover with boiling water. Cover and let sit for several hours or overnight. Essentially, you are making a very strong, stinky Queen Anne's Lace tea.

3. Strain the cooled "tea" through a sieve lined with cheesecloth. Save the tea, discard the flowers.

4. Rinse your pot and add the tea back in. Heat over a medium-high flame. Add the lemon juice, sugar and pectin. Stir to dissolve and bring to a boil. Boil for one minute, then reduce heat to medium. Stir frequently and be sure to scrap the bottom of the pan to prevent burning. Cook for 8-10 minutes until thickened (a good "set" test is to place a plate in the freezer for 15 minutes. Drop a small spoonful of the jelly onto the cold plate. After 30 seconds, the jelly should form a soft set and not run).

5. If you wish, add food coloring to the jelly to give it a peachy-pink color. Otherwise, the jelly with be a very light chartreuse color.

6. Pour jelly into sterilized mason jars or other storage container. Keep in the refrigerator or process in a hot water bath for five minutes. Enjoy!

*You can definitely pick Queen Anne's Lace from fields and pastures (like I did), but pick several feet away from the road to be sure the flowers aren't contaminated with pesticides or road grime. Queen Anne's Lace can also be found at the Farmers Market.

**When making a floral or herbal jelly, be sure to cook in a ceramic or stainless steel pot. Cooper or aluminum pans can chemically alter the properties of the flowers/herbs.

Tuesday, July 12, 2011

Garden 2011


Here it is, my long-overdue post on my garden this year. I planted two beds that are probably about 6'x15' each. My hope is that later this year, I can move the cow fence back a bit, add four new beds of the same dimension, and place a fence around the entire garden. 


The layout of the garden is as follows:


Bed One:
Row 1: Tomatoes (Yellow Pear, Red Currant) and Marigolds
Row 2: Tomatoes (Jet Star) and Marigolds
Row 3: Tomatoes (Beefsteak, Jet Star, Sweet Aroma Hybrid) and Marigolds
Row 4: Tomatoes (Big Rainbow), Peppers (Jalapeno, Jupiter), and Marigolds
Row 5: Peppers (Sweet Pepper Mix, Yellow Bell, Revolution, Portugal Hot ) and Marigolds
Row 6: Radishes (Raxe)
Row 7: Carrots (Danvers 126)
Row 8: Carrots (Danvers 126)
Row 9 Herbs (Dill, Rosemary, Spearmint, Basil)
Row 10: Herbs (Cilantro, Rosemary, Italian Parsley. Chives)
Row 11: Originally had onions but transplants didn't survive. Will be used for fall plantings
Row 12: Lettuce (Rainbow Microgreens, Salad Bowl)
Row 13: Lettuce (Valeria Red Leaf)
Row 14: Originally had Dahlias but transplants didn't survive. Will be used for fall plantings
Row 15: Peas (Garden Sweet)
Border plantings include Pumpkins (Long Island Cheese, Jack-O'-Lantern), Gourds (Small Fancy Mix), Melons (Cool Green Honeydew, Hearts of Gold Cantaloupe, Sugar Bowl Watermelon), Zucchini (Foodhook Organic), Squash (Waltham Butternut), and Cucumbers (Picklebush)


Bed Two:
Row 1: Tomatoes (Jupiter, Brandywine) and Marigolds
Row 2: Tomatoes (Juliet) and Marigolds
Row 3: Tomatoes (Juliet, San Marzano) and Marigolds
Row 4: Tomatoes (San Marzano) and Marigolds
Row 5: Tomatoes (San Marzano) and Marigolds
Row 6: Tomatoes (San Marzano) and Marigolds
Row 7: Tomatoes (San Marzano) and Marigolds
Row 8: Tomatoes (San Marzano) and Basil
Row 9: Horehound, Catnip, Parsley and Basil
Row 10: Broccoli
Row 11: Cauliflower and Cabbage
Row 12: Brussels Sprouts and Celery
Row 13: Carrots (Rainbow Blend)
Row 14: Lettuce (Mesclun Mix)
Row 15: Lettuce (Mesclun Mix)
Row 16: Blank, will be used for fall plantings
Row 17: Hollyhocks (Heritage Outhouse Hollyhocks Single Mixed Colors)
Border plantings include Pumpkins (Small Sugar, Jack Be Little), Zinnias (Heritage Pumila Mixed), Cosmos (Heritage Sensation Mix), and Blanket Flower


I laid grass clippings as mulch between the rows, around the bed, and around each plant. This helps to smother out weeds, retain water, and keep the soil warm. I am hoping I can find enough old bricks on the property to create a little border around each bed. The space between the beds is big enough to fit the lawn tractor and wagon for unloading grass clippings, fertilizer, etc.


The kids and my mom helping to plant the garden

It's not a Martha Stewart garden, but it does the job for now. I've already harvested lots of lettuces and radishes, and soon I'll be able to have my pick of everything else (we have lots of green tomatoes raring to turn red!). In the fall I will plant more lettuce and radishes before I till everything together and plant winter wheat, winter rye, and garlic. To get to the garden, I have to walk under an old Ben Davis apple tree that is dripping with fruit. I set-up our antique lawn furniture next to the garden, as well, so I can watch it grow with morning coffee or evening cocktail. The cows come and visit, too.


Did you plant a garden this year? How is it growing? Are you trying to install your own container herb garden? I'd love to hear about your garden activities this year!

Monday, June 20, 2011

Strawberry Salad

Salad greens from my mother's garden; berries picked by me

Two words indicative of summer are strawberry and salad. Put them together, and experience a flavor profile that is reminiscent of running barefoot through sprinklers, making s'mores, getting sun freckles on one's shoulders, and backyard camping in rickety tents. This Strawberry Salad is a quick, easy meal that can be whipped up for a tasty lunch or healthy dinner. Enjoy!

********************

Strawberry Salad with Candied Walnuts
Serves Two

5 cups (for me, about 4 big handfuls) salad greens, washed and dried
1/2 cup red onion, sliced
1/3 cup feta cheese, crumbled*
1/2 cup sliced strawberries
1/2 cup walnuts, shelled and halved
1 egg white
1 tablespoon sugar
1 teaspoon cinnamon
1/2 teaspoon cloves
1/2 teaspoon paprika
1 1/2 tablespoons extra virgin olive oil
1 tablespoon balsamic vinegar
Salt and pepper, to taste

1. Preheat the oven broiler (or set oven to 500 degrees Fahrenheit). Combine egg white, sugar, cinnamon, cloves and paprika. Add nuts and mix with fork. Place nuts on a foil-lined cookie sheet and bake for 10 minutes or until golden.

2. Meanwhile, combine the salad greens, red onion, cheese and strawberries. Once walnuts are done, sprinkle on top of salad. Drizzle with balsamic vinegar and olive oil. Season as desired with salt and pepper.  Serve immediately.

*Bleu cheese would also be delicious!

Tuesday, June 7, 2011

V-formation (The Geese Travel): Boston, MA

In late May, Dave and I celebrated our third wedding anniversary. We decided to go to one of our favorite places, Boston, to celebrate. In 2007, we were THISCLOSE to moving to Boston, but found the farm instead and decided to make it our home. Needless to say, we love Boston and so enjoy each visit there!

Our hotel room

We stayed at the Inn at St. Botolph, my favorite hotel in Boston (trivia tip! Boston's original name is actually St. Botolphston, and St. Botolph is the patron saint of travelers). It has the feel of a pied-a-terre with the comfort of a luxury boutique hotel (without the price tag of either). It is located right where the South End, Back Bay and Theatre districts meet. It has a residential feel while only being steps away from some of Boston's finest attractions.

When we arrived in our room, a bottle of Prosecco awaited us to kick-off our weekend. After a quick cat-nap, we freshened-up and dressed for the American Craft Beer Festival (held at the Seaport World Trade Center, which was only a quick T-ride and walk away). I would post pictures of all the amazing craft beer I sampled, but I was honestly too busy enjoying myself. Besides, trying to take pictures while double-fisting beer, downing about 30 samples, and keeping track of beers I adored (or hated!) was a bit tough. I think my favorite of the night was the Goose Island Bourbon County Vanilla Stout (though there were many others I loved - let me know if you would like more info in the comments).

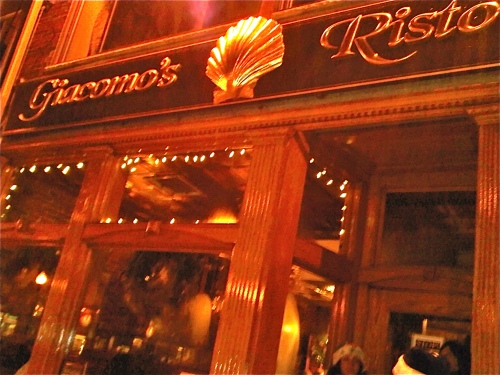
Giacomo's, via Stef's Smorgasboard

We grabbed a cab back to our "home base" and then walked to Giacomo's for some tasty Italian. The atmosphere was super-cozy, and the food unbelievably good (we split an order of garlic bread, Dave had the best Chicken Parmesan either of us have ever tasted (no lie), I had the other-worldly Pumpkin Tortellini in Fresh Sage Sauce, and we shared the Chocolate Bomb for dessert). The quick walk back to our hotel was the perfect digestif for our beer-laden, Italian-stuffed bellies.

Saturday morning, we grabbed a quick coffee at the Prudential Center, then headed down Boylston and Newbury Streets to do a little window shopping. We decided to sit-a-stay by the Lagoon in Boston Common and watch the Swan Boats pass slowly by.
  

We crossed through the park to enter the Beacon Hill neighborhood. We hopped in the (45-minute long!) line at Paramount for lunch. Dave opted for breakfast (egg, bacon and cheese on toast with homefries), while I had the apple, candied walnut and bleu cheese salad with chicken. Both were worth the wait. We walked through the history-rich district and stopped to pick out some antique artwork and prints (our anniversary tradition - we buy a piece of art each year!). I also picked up a great old Currier and Ives book of plate listings and illustrations. While there, Dave found a Dartmouth yearbook from 1939. We looked for Dave's grandfather (both Dave's dad and grand-dad went there), but the book post-dated him.


I am obsessed with boating and sailing, and Dave indulged me and took me down to the Charles River Esplanade to watch the dinghies. It made me love boats even more. We headed back towards the park, stopping at Cafe Vanille for a coffee and sweets (I couldn't choose between a chocolate eclair or a Night and Day bar - a bruleed sponge cake paired with vanilla bavarian cream and chocolate mousse), so I bought both, eating half of each (file this under This Is Why You Are Fat). We stopped to smell the new blooms on the roses in the park and laugh at Boston's pride for its sports teams (the Bruins were in the Stanley Cup finals, so all available statues donned jerseys, including the famous ducks (of Robert McCloskey fame) and George Washington).


After getting gussied-up at the hotel, we took the T down to Long Wharf to board a yacht for a sunset cruise of Boston Harbor. We met a lovely couple from London and chatted with them for a bit before witnessing sunset ceremonies of the USS Constitution (aka Old Ironsides).


Bad Blackberry photo of our view from the Top of the Hub

We walked around downtown and the harbor under the romantic glow of streetlamps, then headed back to the South End for dinner at Mela. Listen, I have had Indian cuisine all over the world, and I can honestly say this was the best I have ever tasted. Once our dishes arrived (Naan, Chicken Tikka Masala, and Vegetable Korma - all organic), Dave and I spoke nary a word to each other. Our faces were in our plates for the rest of dinner. The waitstaff was so incredibly nice, and when I mentioned how much I loved the food, our waiter brought us a $10 gift card for our next visit. Don't worry that we are not Bostonians... we will definitely be back! Even though our bellies were full, we decided that the night sky was too clear to not take advantage of the views at the top of the Prudential Center. We journeyed up 52 stories to The Top of the Hub, where we enjoyed a Kamakazi (Dave), Gin Gimlet (me - downed in about three minutes because of how perfect it was!), a plateful of freshly baked cookies, and perfectly-perked coffee. Needless to say, we slept hard that night.


Views of the South End

Splash Fountain

Sunday morning was a bit lazy, as we strolled through the South End, grabbing a quick bite at Thornton's and making our way to Splash Fountain at Christian Science Plaza. We sometimes fantasize about buying a little apartment in Boston, so we snuck into an open house to check out the real estate scene in the city. Finally, we headed back to the car and out to Brookline for a late lunch at Zaftigs, one of America's Ten Best Delis (as rated by National Geographic). We could have built our whole meal just on the bagel chips and herbed cream cheese (complimentary with every order!), but we also shared Holly's Heavenly Salad and the Challah French Bread.

Dave and I always joke that we must look like we know what we are doing when in Boston, because we get asked for directions so much (on this trip, we were asked five times - it must be the Irish lass in me). We are now home, safe and sound at the farm - albeit fatter, but more in love than ever. It was an amazing trip, and I can't wait to head back to Beantown!